
Creating Shift Times (Shift Templates)
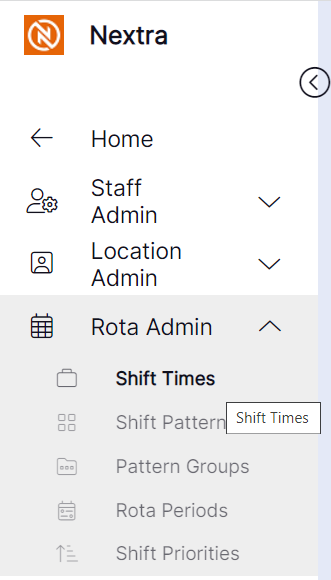
Step 1– Select the "Rota Admin" tab, this will give you a drop down menu where you can then select "Shift Times".
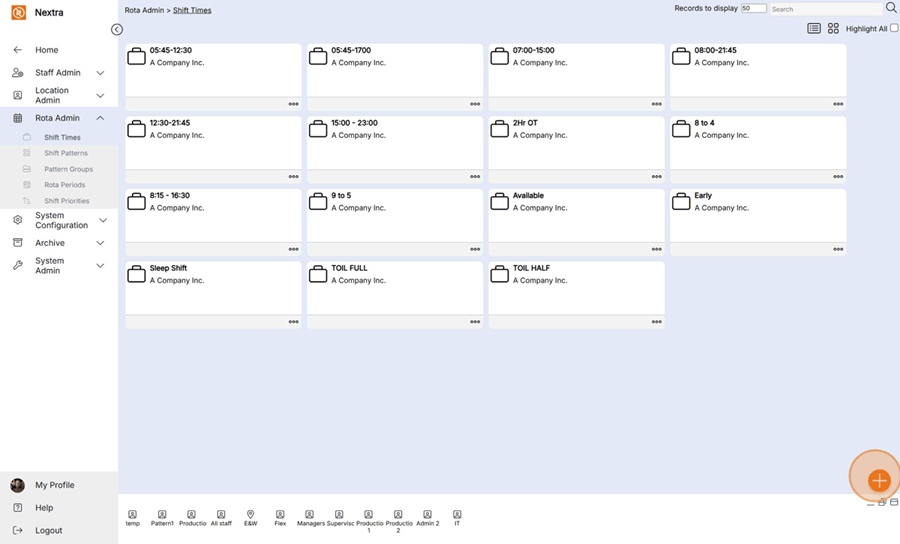
Step 2– Select the Orange + button in the bottom lefthand corner to create a new shift time.

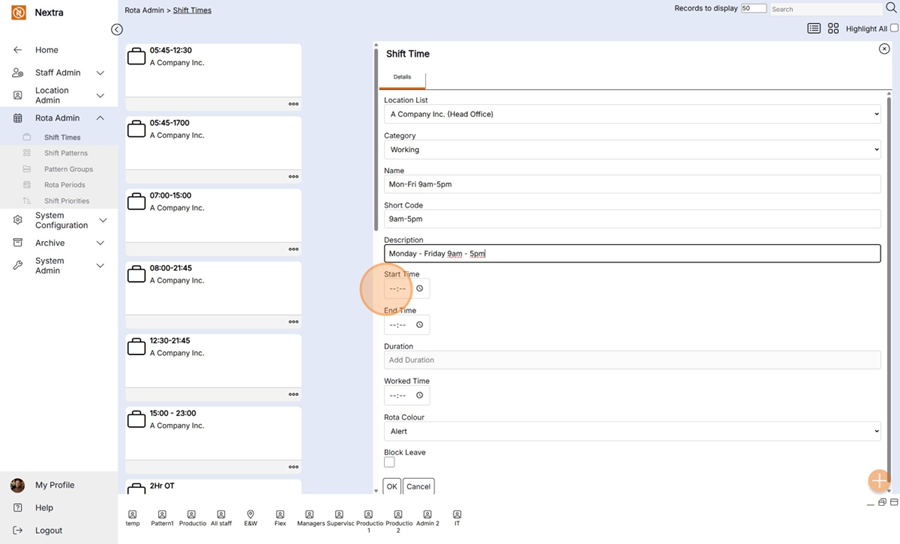
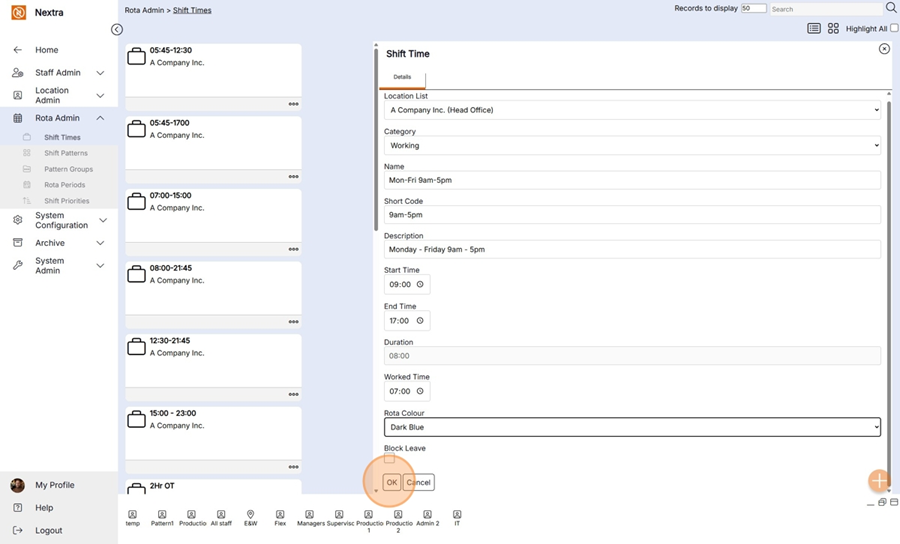
Step 3– Enter the details of the new "Shift Time" using the example below. Use the scroll bar to complete all details.
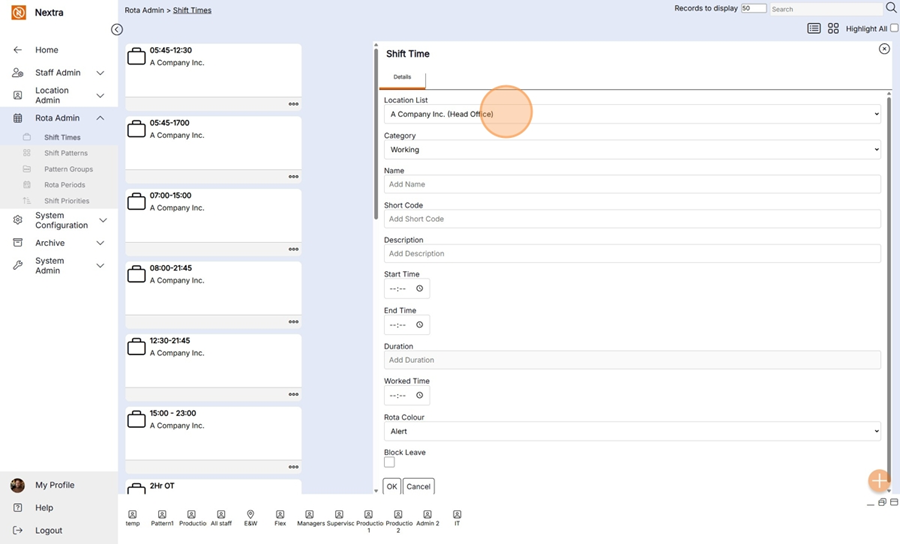
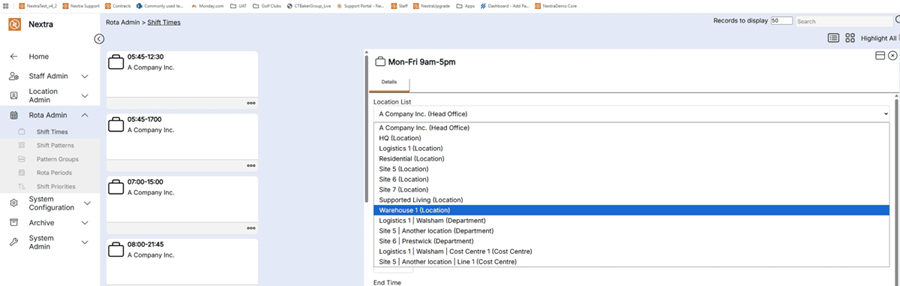
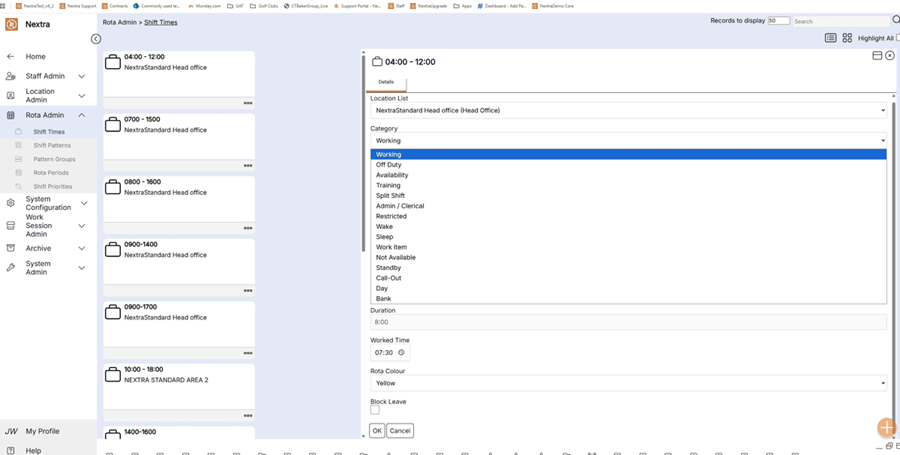
Location List– Select the location in which this "Shift Time" should be available for use on the Rota or to create Shift Patterns with. I.e., if this Shift Time should be available to all users, select the highest location in the system hierarchy. If it should only be available to users in one specific location, select that specific location. If it should be available to all users in a particular location plus any location above and below that chosen location (i.e., in the same branch of the organisational tree), select that location.
Category– Select "Working" if this is a shift that will be worked by staff or select "Availability" if this is a time that you would like users to be able to set themselves as available to work on their self-service login.
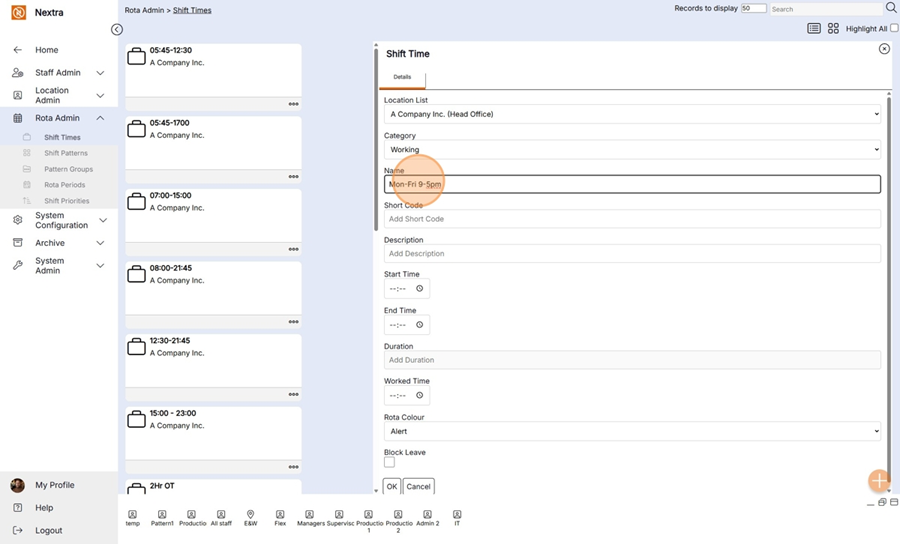
Name– Enter the name of the shift as users want to see it on the Rota, within Shift Patterns, and on the My Rota section of self-service. It will display the same name in all 3 areas.
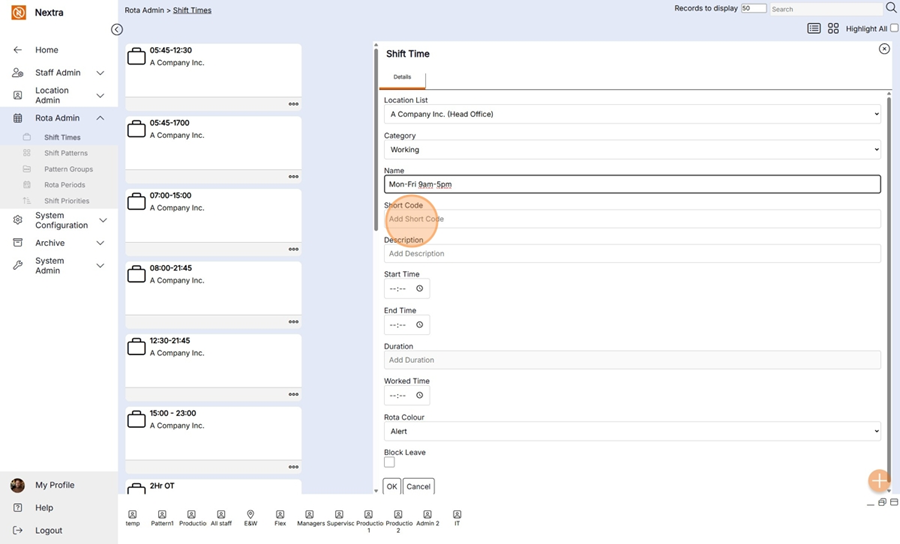
Short Code– Enter a short code for the shift, for example, E for early, L for late, N for night.
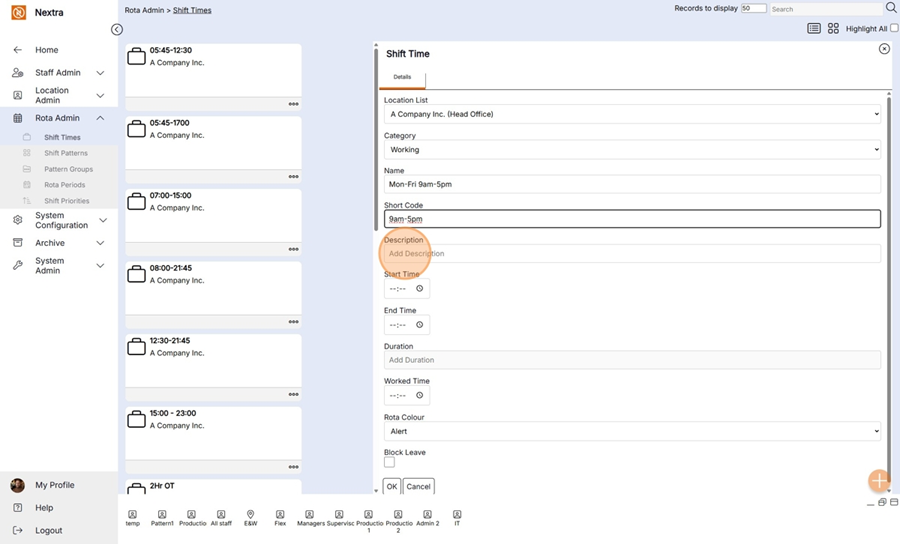
Description– Enter a general description for the shift (this is not a mandatory field).
Start Time– Select the start time of shift.
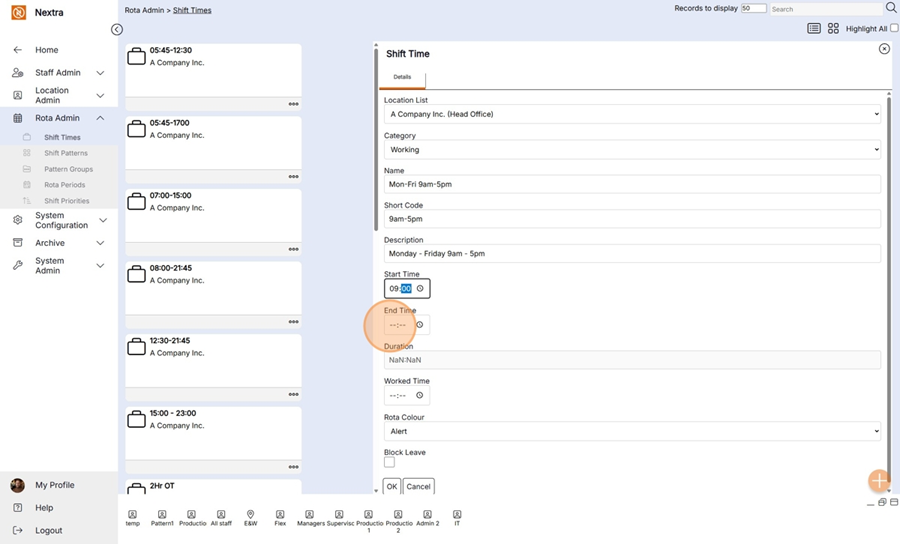
End Time– Select the end time of shift.
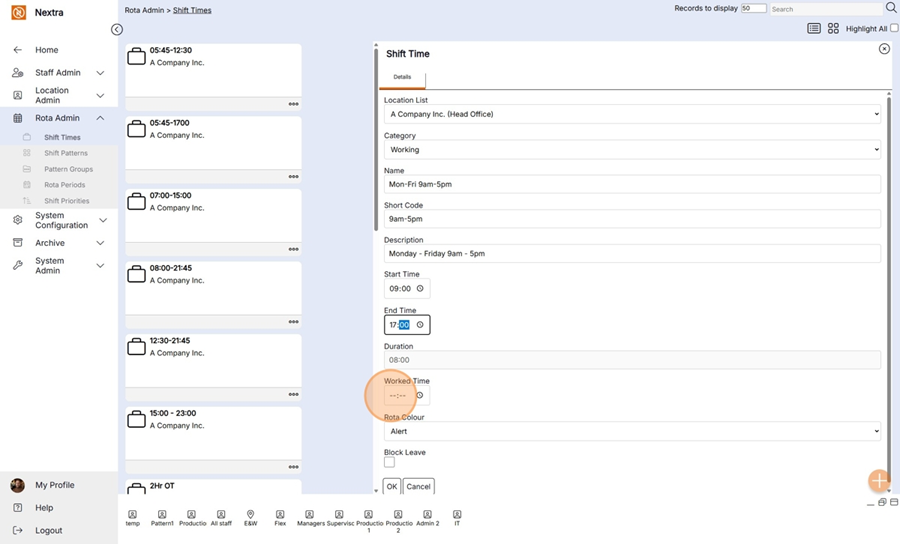
Duration– This displays the duration from the start to the end of the shift (this is auto populated by the system and not editable by the user).
Worked Time– Select the number of hours of paid work for this shift, i.e., excluding any unpaid breaks.
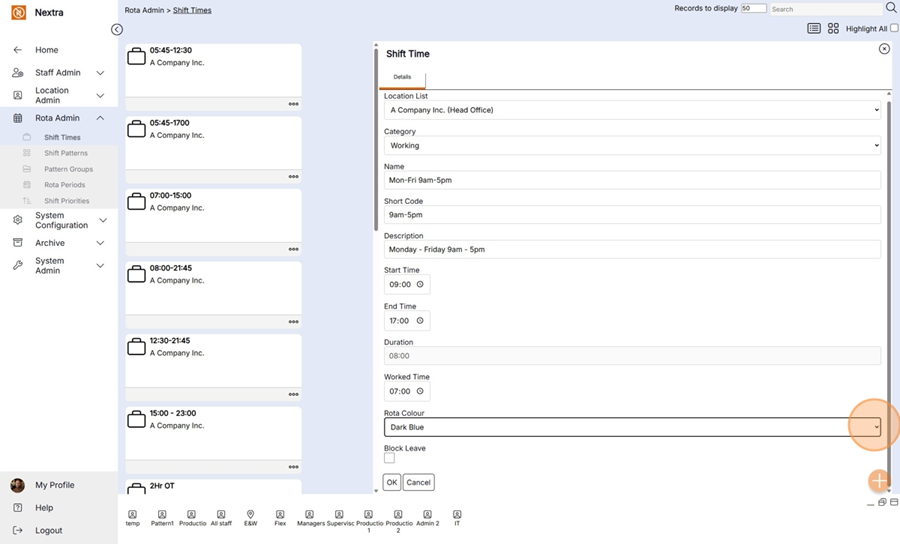
Rota Colour– Select the colour of the shift when displayed on the Rota if the user selects the setting of Colour by Shift on the Rota.
Block Leave– If this box is ticked, staff will not be able to book leave for any day that this shift has been assigned to them on the rota.
Users can select "Cancel" if they no longer wish to continue with creating this Shift Time, the pop up will slide to the right and they will be returned to the Operational Area of the Admin screen.
Step 4– Select "OK".
Following selecting "OK" the pop up will slide to the right and the user will be returned to the Operational Area in the Admin screen.
Please note: The Shift Time will not appear in the Operational Area until the user has refreshed the display.