
Pattern group Apply tab – generating the rotas for the staff members within the pattern group
Once all the initial updates or changes within the pattern group have been made and previewed via the preview tab to ensure the rotas will be correct, the functionality on the apply tab can be used to rota the members of staff within the group onto the relevant ‘Shift Pattern’ and generate a rota for the location chosen.
Please note: Users need to apply the pattern at the location where the staff members will be working, so that staff can see the location at which they will be working, and that users responsible for rotas within the system will have access to amend their shifts in that location if necessary:
To generate a rota for staff working on a regular pattern, follow these steps:
Step 1 – Select the ‘Apply’ tab.

Step 2 - Select the Location where the ‘Shift Pattern’ is to be worked using the drop-down menu, followed by applying a Start Date and End Date for the pattern using the calendar icons.
Step 3 - Select the ‘Delete Existing Shifts’ tick box as required.
Step 4 - Select to Re-apply’ or ‘Cancel’ any existing absences as required
Step 5 - Users can choose to apply the pattern to all the ‘Pattern Group’ members or select individual members.
Step 6 – Select ‘Apply Pattern’ to assign the shifts to the rota for the selected staff members.
HANDY HINT: You can only apply patterns for up to a maximum of 1 year at a time to prevent lengthy rota loading time within the browser. You can use the Bulk Pattern renewal ‘Smart Tile’ to monitor when your patterns will require renewal.
Users should select the ‘Delete Existing Shifts’ tick box to overwrite any existing shifts that have been previously applied on the rota, this should be used if a member of staff has moved from one ‘Pattern Group’ to another due to a change of working pattern. They can then be rostered using a new pattern from the correct date.
Please note: This will also overwrite availability shifts already applied that are on the ‘Rota’ where the staff member has marked themselves as available to work via the ‘My Availabilities’ ‘Smart Tile’ on self-service, it is therefore advised that users check the staff member’s rota before proceeding or advise them to reset their availability following a change of pattern.
Users should select to ‘Re-apply’ or ‘Cancel’ any existing absences that have previously been entered on the rota by selecting the correct option from the drop-down menu. In most cases re-apply absences will be applicable as staff may not wish to change holiday previously booked. However, if due to a change in working pattern, the holiday previously booked is no longer applicable, delete absences should be selected.
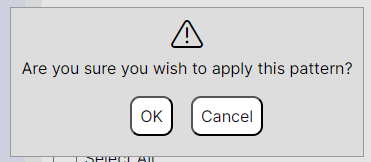
Step 7 – Select ‘OK’ to proceed with applying the shifts to the rota.
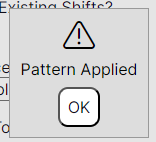
Step 8 – Select ‘OK’ when the system advises the patterns have been applied.
Day to day amendments can then be made to staff members on the rota by the user, for example, absence bookings, shift swaps or a change of shift times. If the working pattern changes, users must follow the process documented in this section of the user guide to update fixed patterns for staff.
WORKING EXAMPLE: If a staff member was originally on a Monday to Friday 9-5 pattern with weekends as days off, and then changes to ‘4 on 4 off’ pattern, in this situation the cancel absences option may be of better use, as any days they have booked off as holiday already, they may no longer be working anyway as they have days off on weekdays, whereas they did not previously.