Roll Call - Step-By-Step Guide
Please follow the steps below on how to use the Roll Call Tile from start to end.
Step 1:
From the Nextra navigation menu click on Management. The user will then find the Roll Call Tile.
Step 2:
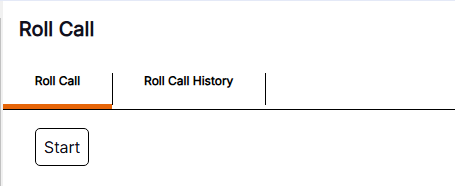
The Roll Call will show a Roll Call tab, Roll Call History tab and a Start button.
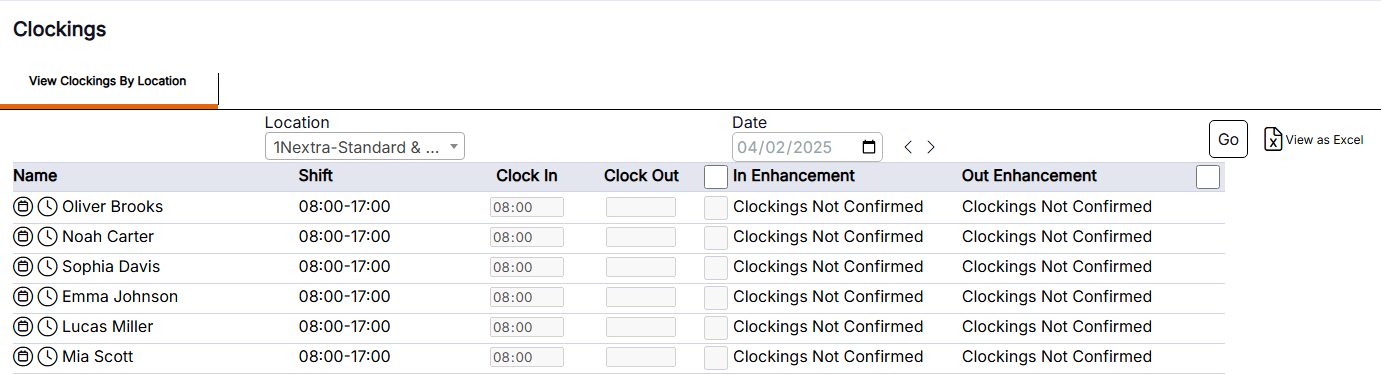
Please Note: For staff to show on the Roll Call, staff will need to be clocked in on the Clockings tile. If a staff member forgets to clock out on the same day as clocking in, they will continue to show on the Roll Call for the following day until they have clocked out.
Step 3:
For a new Roll Call to begin the user will click on the Start button.
Please Note: As soon at the Start button is clicked, the Roll Call will will begin and will be Active. Users will be able to see the Running time of the Roll Call from Start to End.
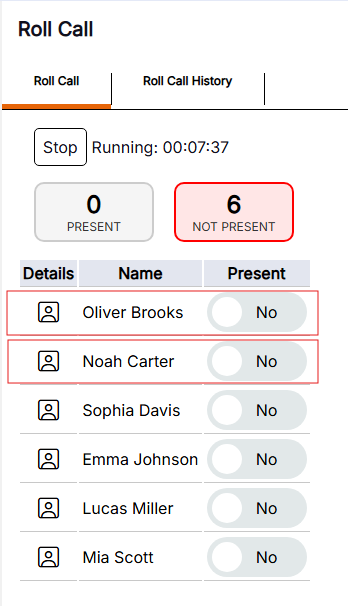
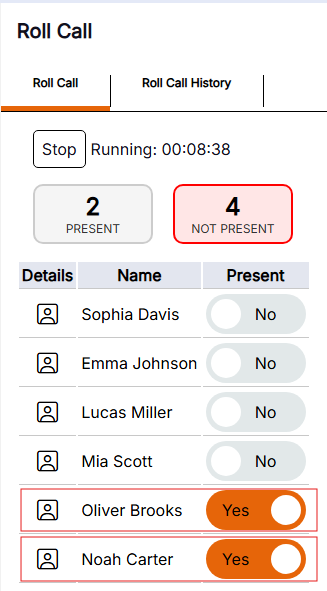
Step 4:
The staff members that have clocked in will be the only ones shown on the Roll Call list. Clocked staff will show as NO in the Present column until the user has toggled them to YES. Once the staff are showing as present they will automatically go to the bottom of the list.
Please Note: The Present and Not Present figures will update every time a staff member is toggled from YES to NO in the Present column.
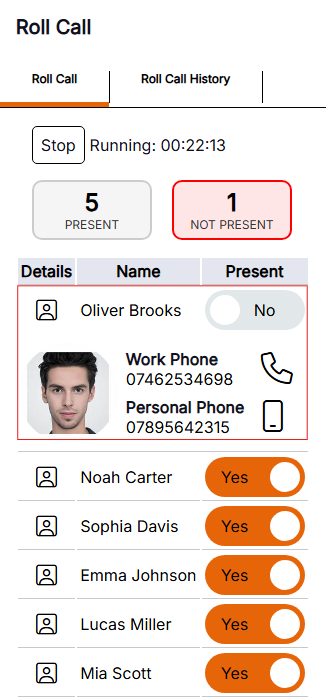
Step 5:
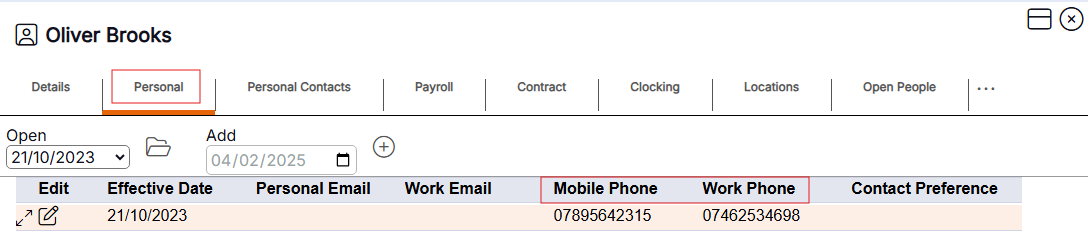
If a staff member has clocked in but is not Present for the Roll Call, the user can click on the Details icon and this will bring up a photo of the staff member and also their contact details.
Please Note: The staff members photo will only show if one has been added to their staff record. Users will only be able to contact a staff member via their Mobile or Work Phone number if they have their contact details saved in the Personal tab of the staff record. The user can directly call the staff member from their mobile phone on the Roll Call tab by tapping on the Phone icon. It will automatically take the user to the dial out pad on their phone. Once the user has found the staff member, they can then update the Roll Call accordingly.
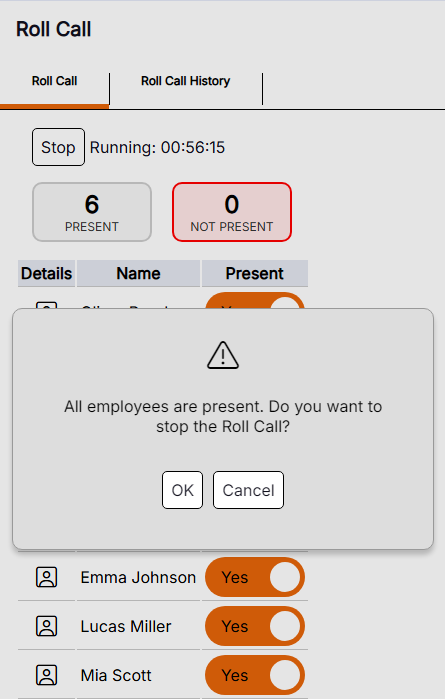
Step 6:
Once the user has marked all staff as Present, a validation message will pop up asking 'All employees are present. Do you want to stop the Roll Call?' At this point the user can either choose OK, this will then stop the Active Roll Call, or they can choose to Cancel and this will take them back to the Active Roll Call.
Step 7:
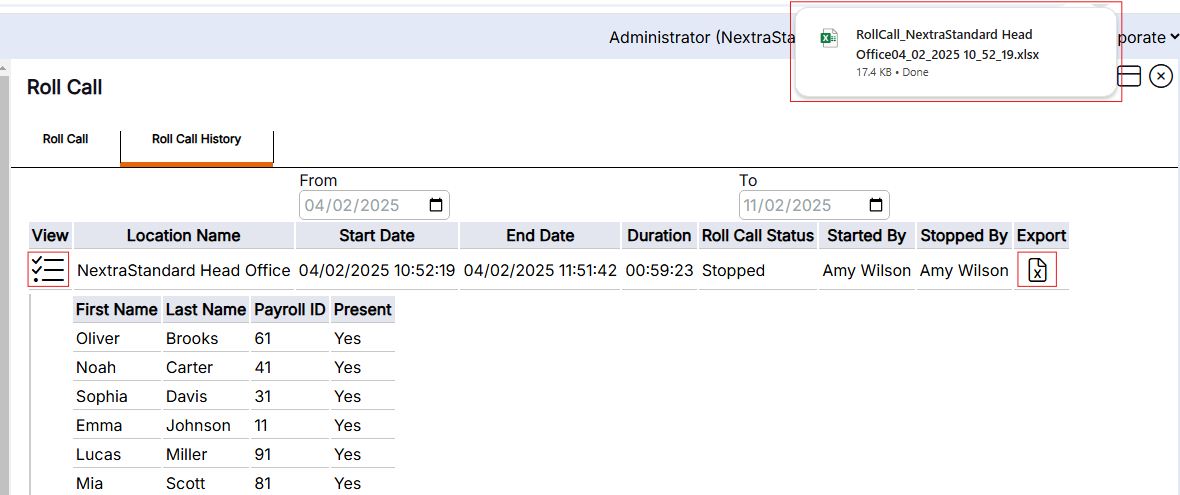
Once the User has stopped the Active Roll Call, they can go onto the Roll Call History tab.
The History tab will show the following information:
- Location Name of the Roll Call
- Start Date and Time of the Roll Call
- End Date and Time of the Roll Call
- Duration of the Roll Call
- Roll Call Status (Whether it is still Active or if it has been Stopped)
- Who the Role Call was Started By
- Who the Roll Call was Stopped By
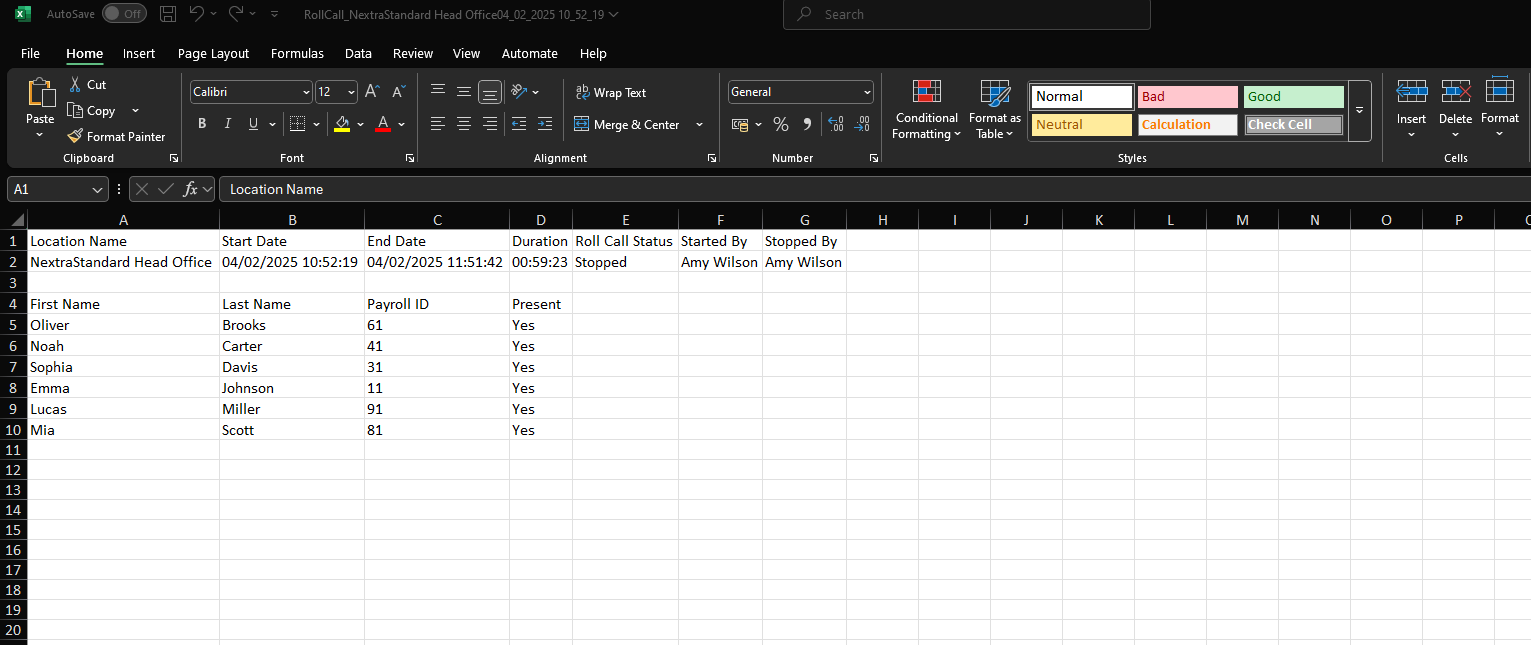
Please Note: The history for the Roll Call can be exported to Excel for reporting purposes. This will be saved in the Downloads file on the browser being used.