
My Timesheets Userguide
Please follow the below steps on how to use My Timesheets.
Step 1:
My Timesheets can be located when logged into Self Service.

Step 2:
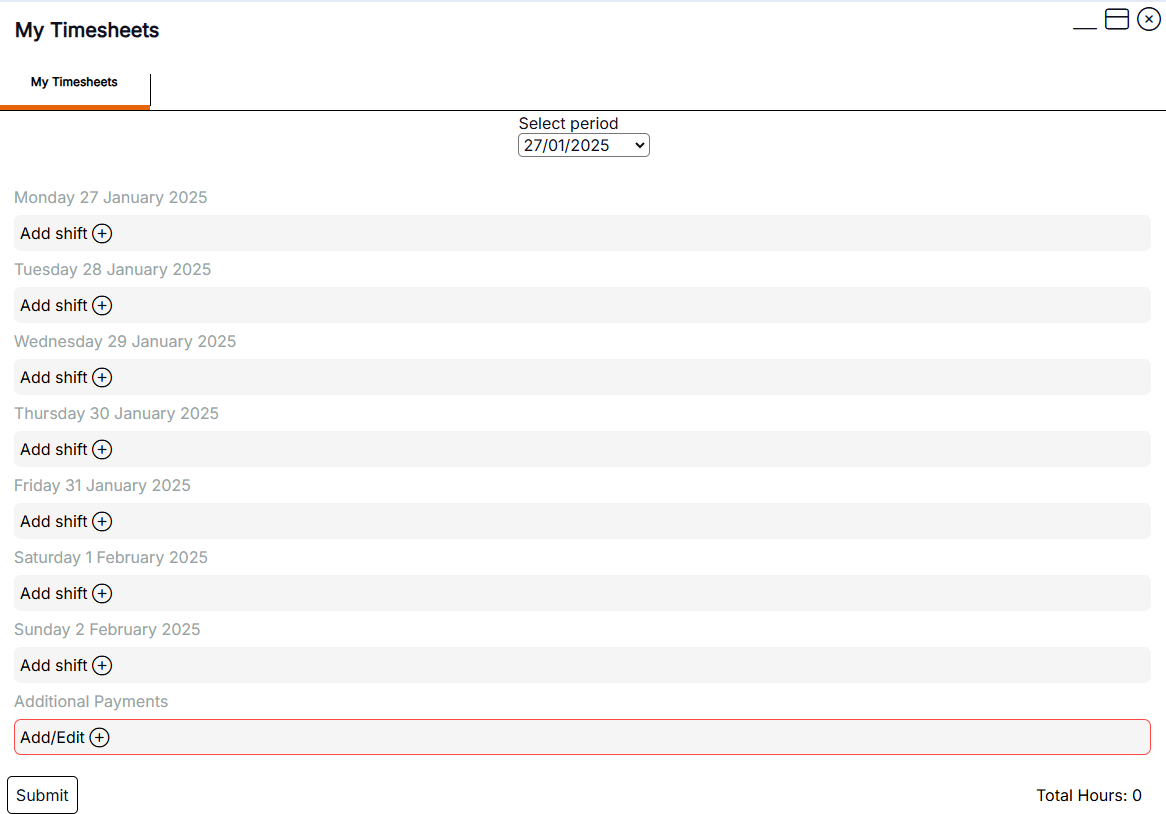
When the user opens up My Timesheets they will see a Select Period drop down list with dates, then the selected period where shifts will be added onto.
Please Note: Shifts can be seen in My Timesheets if they have been added to the Rota, or they can be created by the user as per screenshot below.
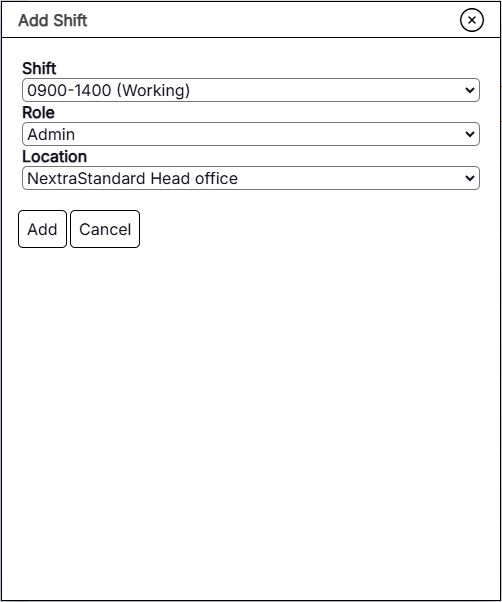
Step 3:
The user can add a shift in My Timesheets by clicking on the Add Shift + icon. A pop up will show with the following drop down fields:
- Shift - The time of the shift
- Role - The role of the shift
- Location - The location of the shift
Please Note: The screenshot below can be built to meet individual clients needs.
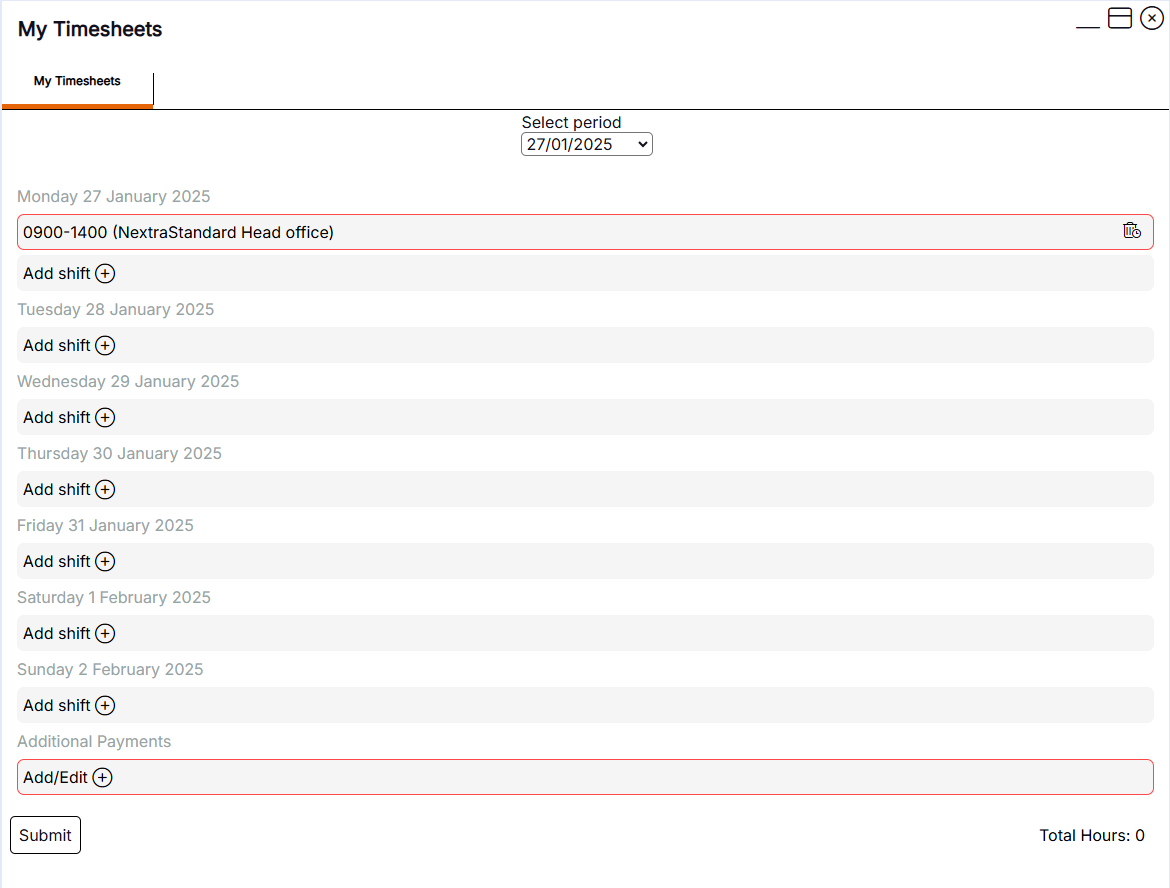
Step 4:
Once the user has completed all the fields, there's an Add button that will add the shift onto the timesheet. The front of the shift will display with the time of the shift and the shifts location.
Step 5:
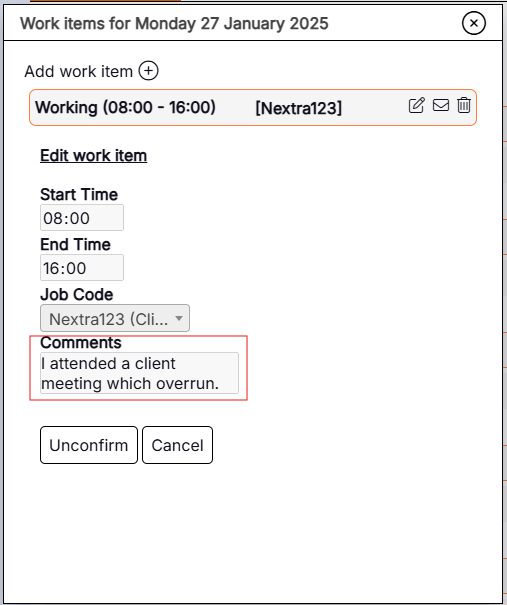
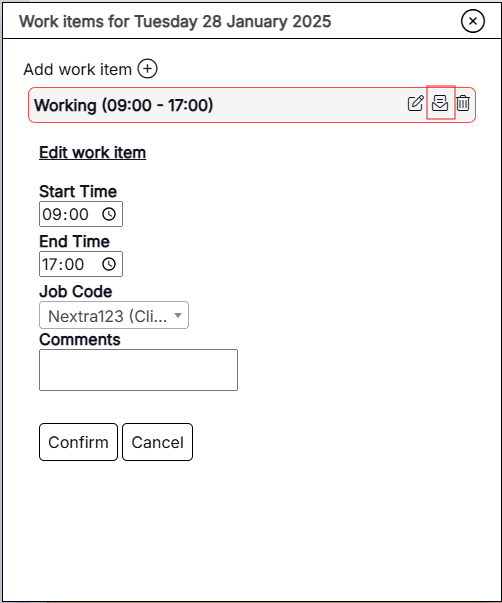
The shift can be viewed if the user opens it by clicking on the created shift. Once the shift has opened the user will be able to edit their Start and End Time by clicking into the field and typing over the current times showing. There is also a Job Code drop down field where the user can select a specific job code to report what they have been working on/where they have been working.
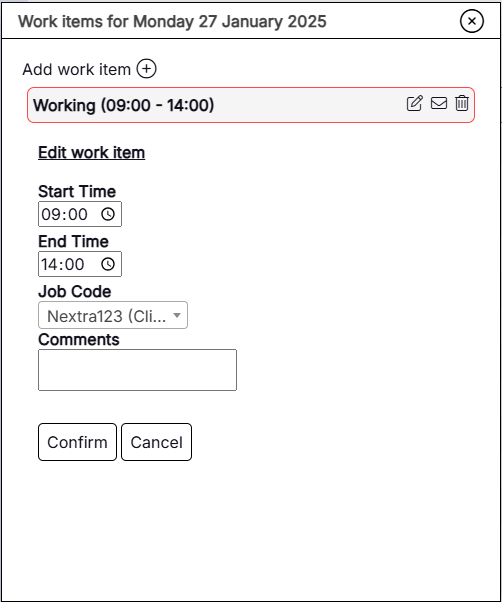
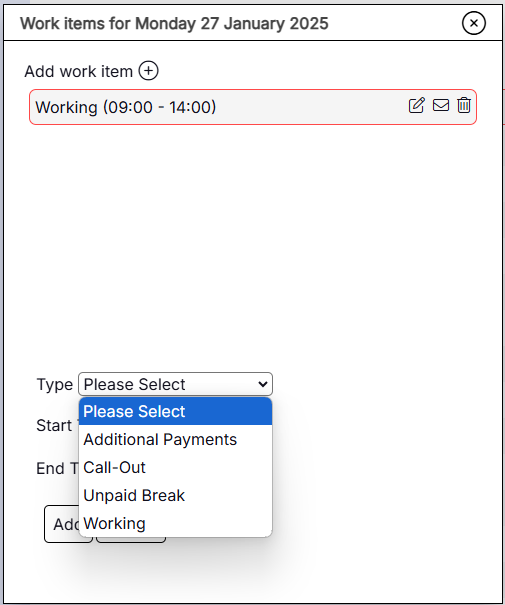
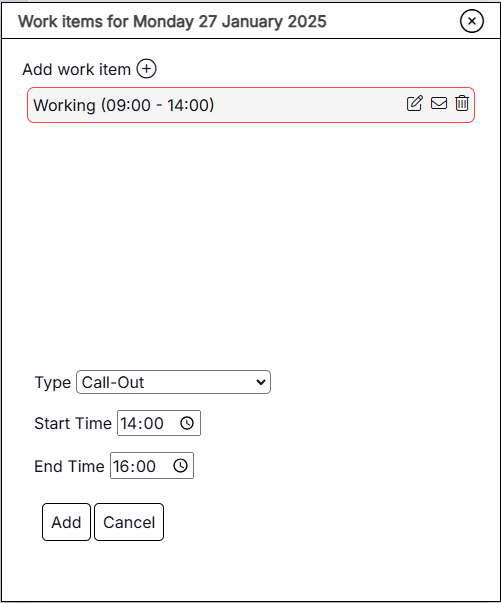
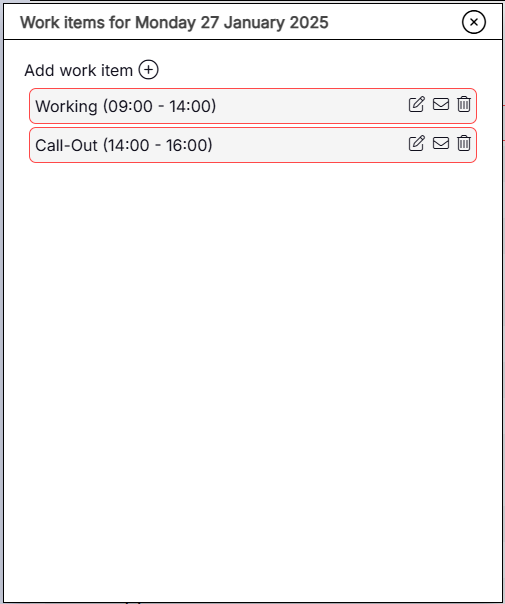
Step 6:
The user can add additional work items onto shift by clicking on the Add work item + icon. For example, the user will do this if they've stayed later than their planned shift for additional work or if they've been called out for emergency work, overtime is required or even to report that they worked through their break time. Once an additional work item has been selected, the user can then input the Start and End Time they worked till then Add it to their shift.
Please Note: Multiple work items can be added onto a shift.
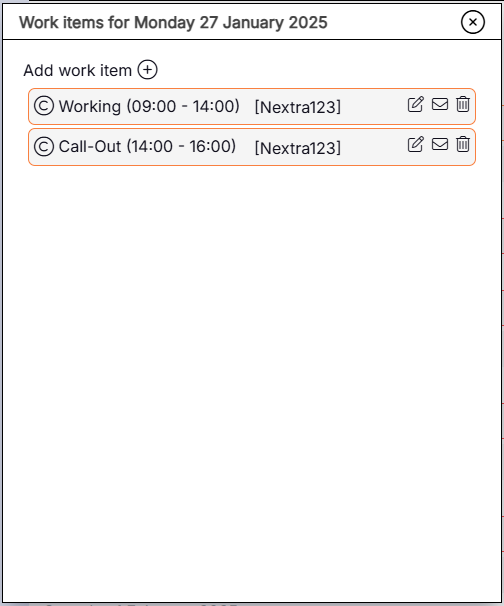
Step 7:
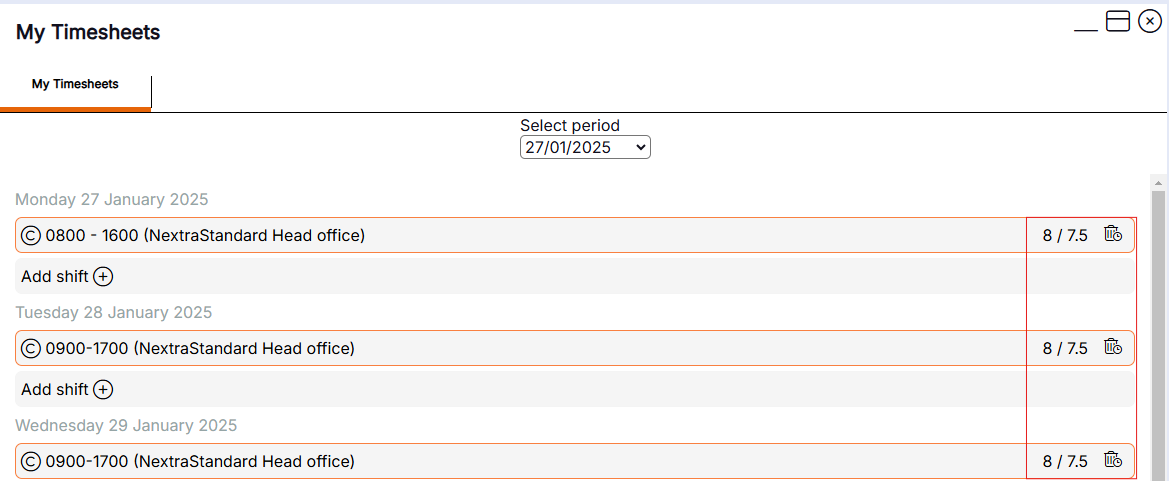
Once the user is happy with their Timesheet they can now Confirm their shifts so it can go through to Timesheet Approval for their managers to approve and put through to Payroll. If the user has made a mistake with their timesheet and needs to delete the whole shift or an individual work item they can do this by clicking on the Delete icon within the shift or the Delete icon on the front of the shift to remove the shift completely.
Please Note: This will apply to client T&A rules.
The user can Confirm their shifts by clicking on the shift and opening up the work item(s). Once opened the user will see the Confirm button. When the work items have been confirmed it will outline the shift from red to an orange box and it will show a C so the user can see that it has confirmed.
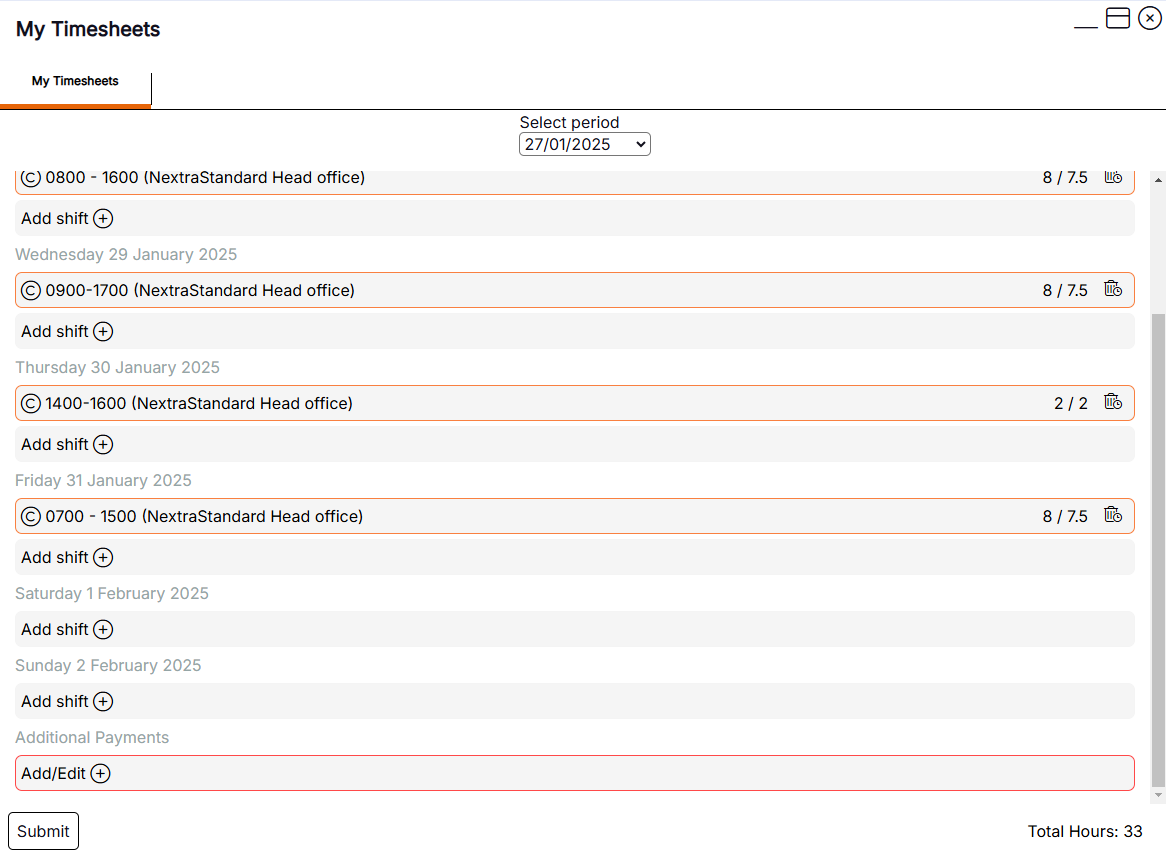
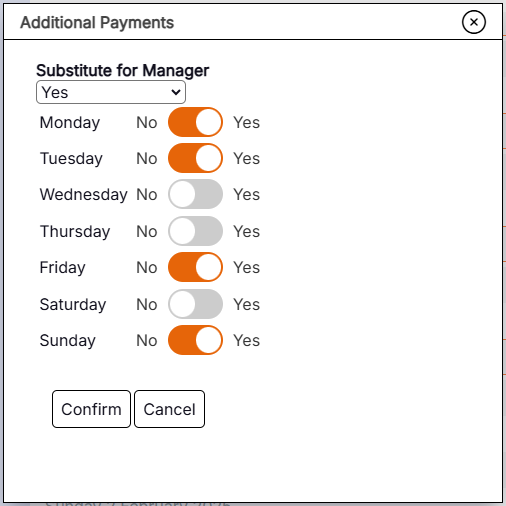
Step 8:
On the users timesheet there's an Additional Payments section at the bottom. There's toggle functionality to Substitute for Manager where it shows Monday-Sunday with a toggle to say Yes or No and on what day they substituted for. Once updated the user can Confirm this.
Please Note: This field is bespoke per client and will apply to client T&A rules.
Step 9:
When the user has Confirmed their shifts they will see at the end of the row a Total Hours field. This shows per shift and will deduct the break time from the total.
For example: If a user has a shift for 8 hours and they take a half hour break it will show as 8 / 7.5.
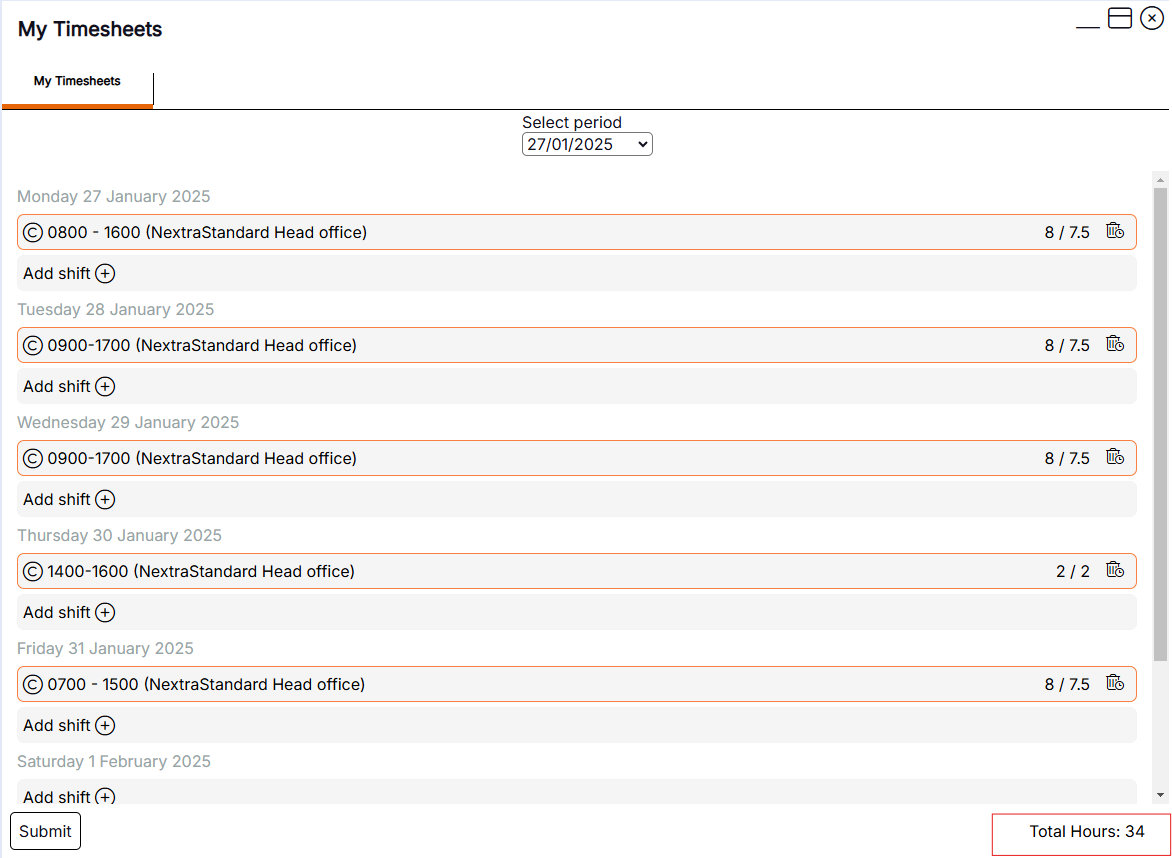
Step 10:
There is a Total hours field at the bottom of the screen which shows the total number of the shifts worked during the period.
Step 11:
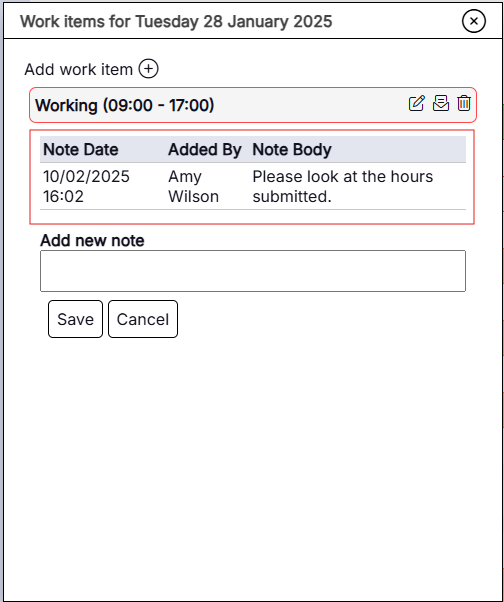
If a user requires to add a note onto their shift before submitting their timesheet for manger approval, they can do this by leaving a comment in the Comments box. If a manager rejects a shift and sends a note back it will show the note icon as open so the user is aware that there's a note waiting to be read.
Step 12:
The user can Submit their timesheet once they're happy with their shifts. This will go through to the manager on Timesheet Approval to either Approve or Reject.
