
Creating New Contracts
New ‘Contract’ can be created in the system using the following steps:
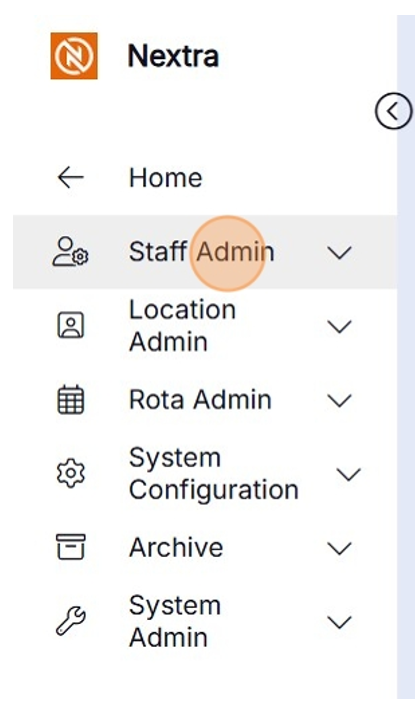
Step 1- From the Homepage select 'Admin'

Step 2- Select 'Staff Admin'
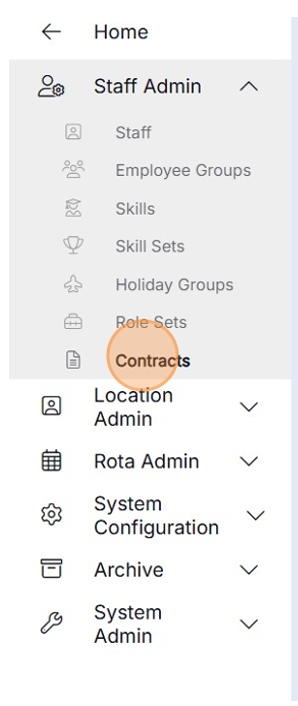
Step 3- Click on 'Contracts'
Step 4- Click on the orange plus button in the bottom Left-hand side, then click 'Create'
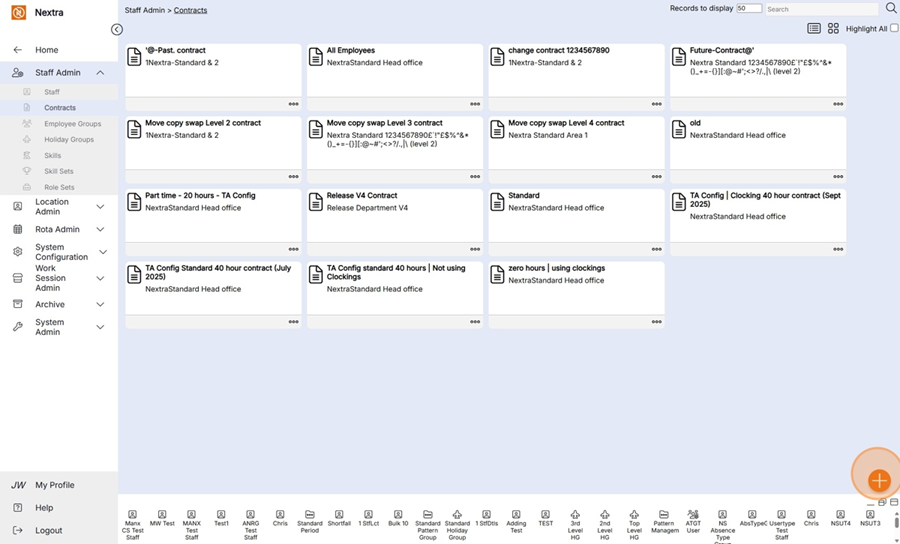
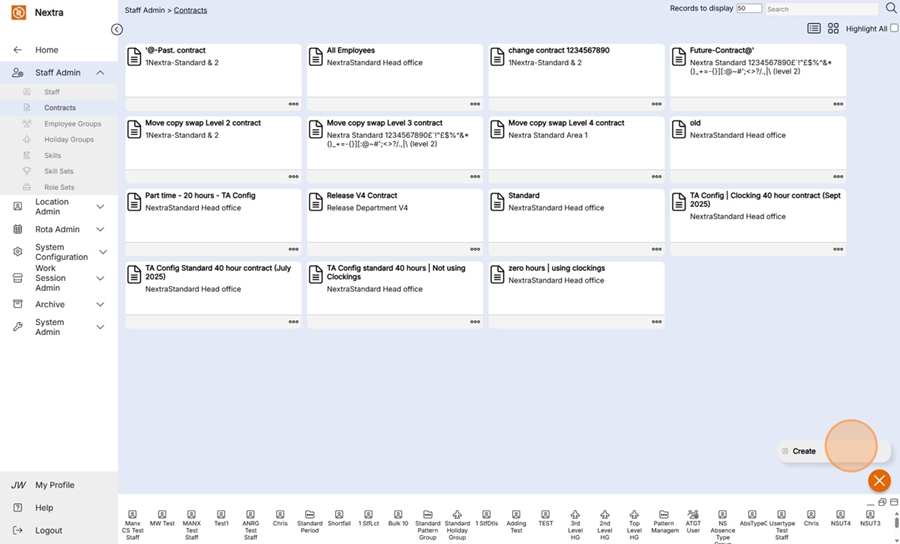
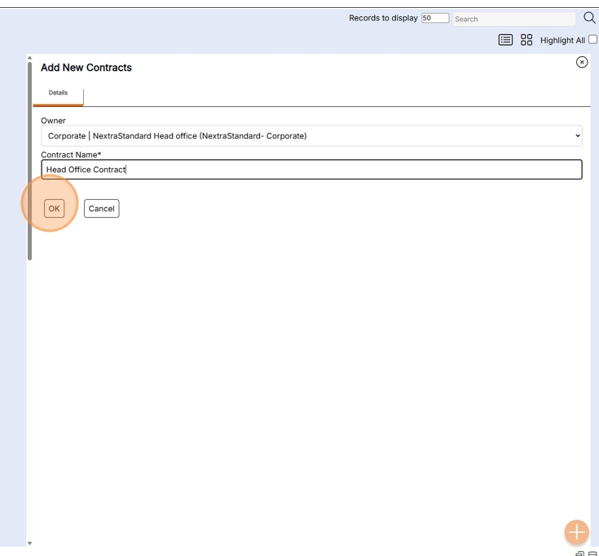
The new ‘Add New Contracts’ record will display as per the example below:
Step 5- Update the details by using the drop-down menus and typing in new data.
i) Select what level the contract will sit within the organisation
HANDY HINT: When selecting the ‘Location' of the ‘Contract’, ensure you select the ‘Location' at which the Contract’ is relevant within the hierarchy. For example, if this ‘Contract’ could be assigned to any staff member in any ‘Location' of the business you should assign the top-level location, so it appears as an option to assign to any staff member regardless of their ‘Principal Site’ in the system. Alternatively, if this ‘Contract’ is only for staff working in a particular department and therefore also relevant to any staff within an area of that department, you should choose the department as its ‘Location', in order that it can only be assigned to employees in the same branch of the hierarchy as this department. I.e., if the department was on level 3, it would not be available to a staff member in another department on level 3 as they are in a different branch of the hierarchy.
ii) Give the Contract a name

Step 4 – Select ‘OK’ to create the new ‘Contract’.
Contract Name: Enter the name of the ‘Contract’ as you would like it to display in the ‘Admin’ screen, and as an option to assign to staff members on the ‘Contract’ tab of their staff member record.
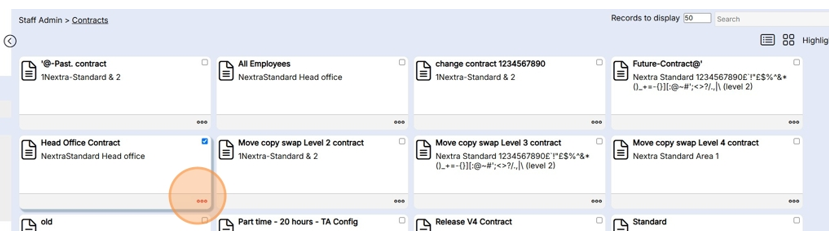
The Contract now requires configuration - The following steps show how to complete this.
Step 1 - Click the three dots to open and configure the contact.
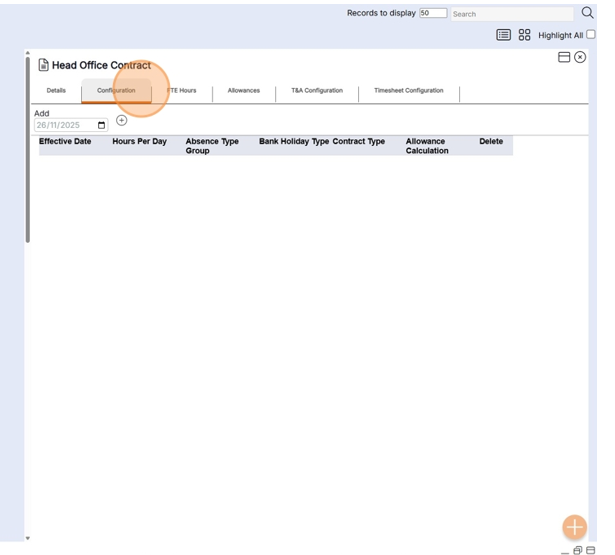
Contract Configuration
There are a number of tabs which can be configured to suit the business needs.

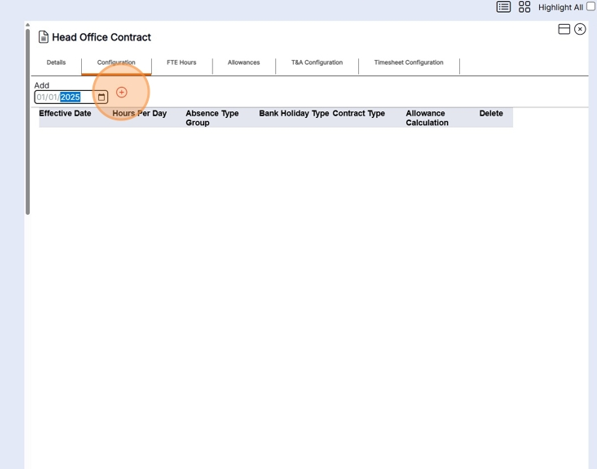
Configuration Tab
Step 1 - Select the configuration tab
Step 2 - Enter the date the contract is to start from
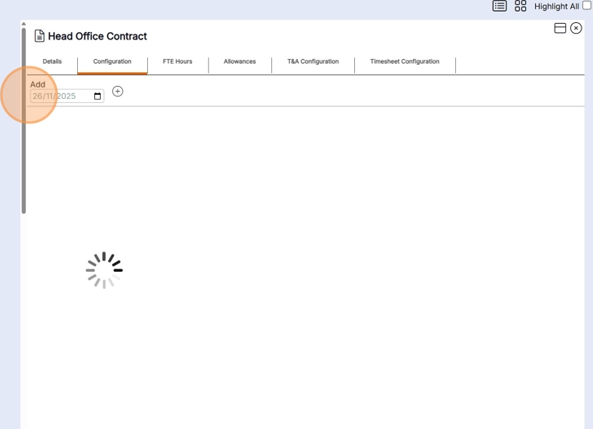
Step 3 - Press the + button to access the configuration page
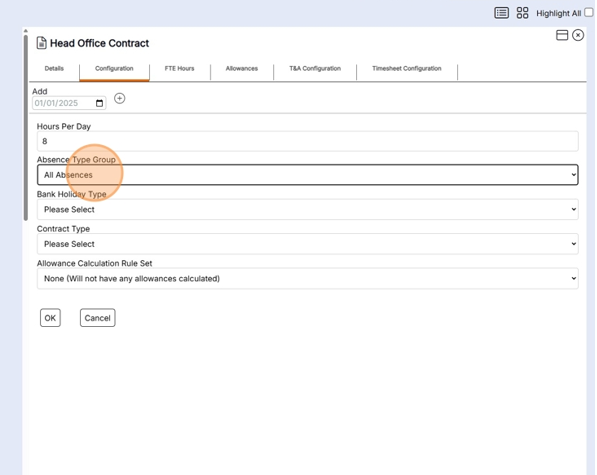
Step 4 - Enter the hours per day
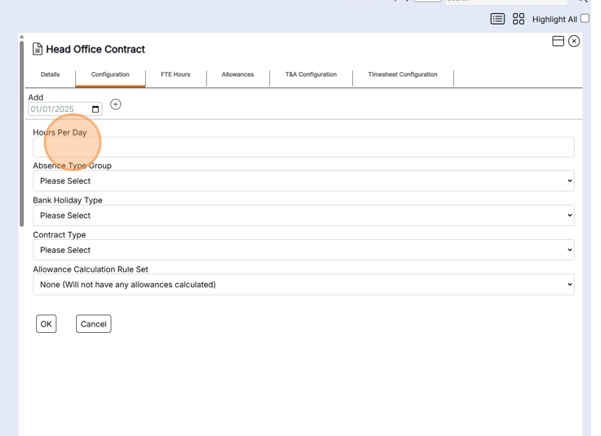
Step 5 - Select the Absence Type Group the contract is using
Step 6 - Select the Bank holiday types
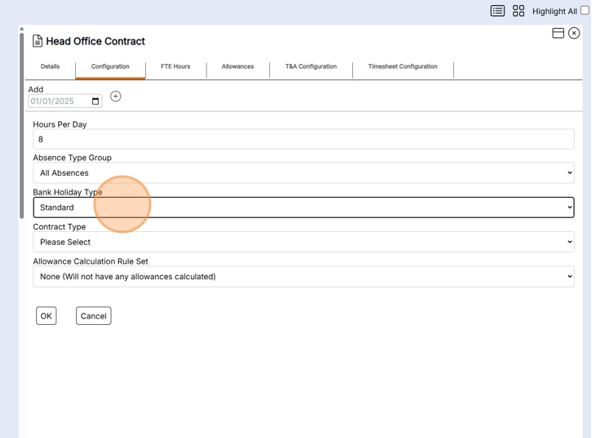
Step 7 - Select the contract type
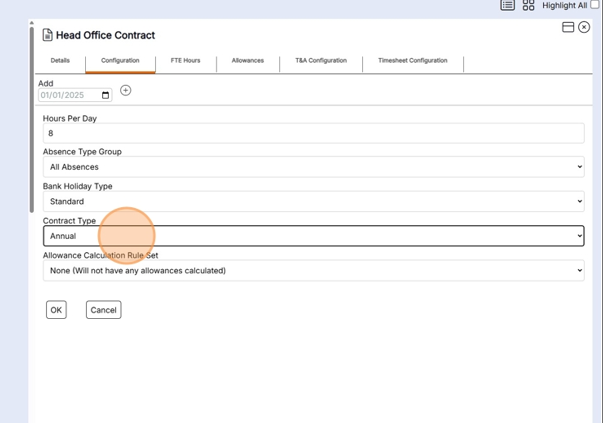
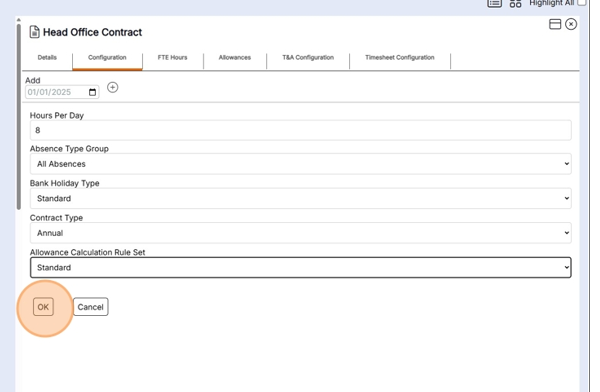
Step 8 - Select the Allowance calculation rule set applicable to this contract
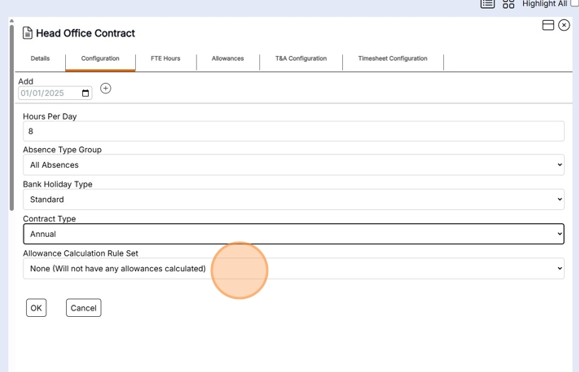
Step 9 - Press OK to save
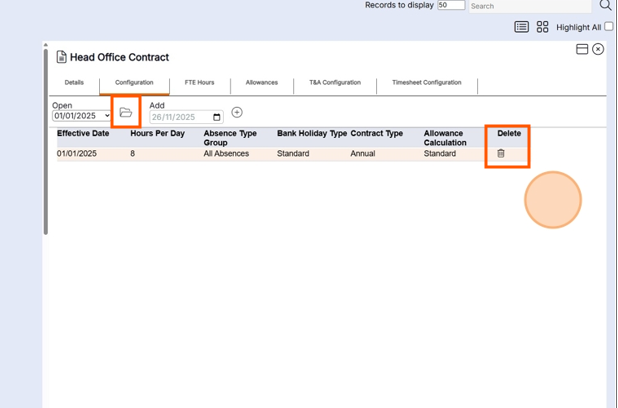
When the record is saved a summary will show on the Configuration tab. To view the details or make changes click the Folder icon. The whole record can be deleted using the bin icon
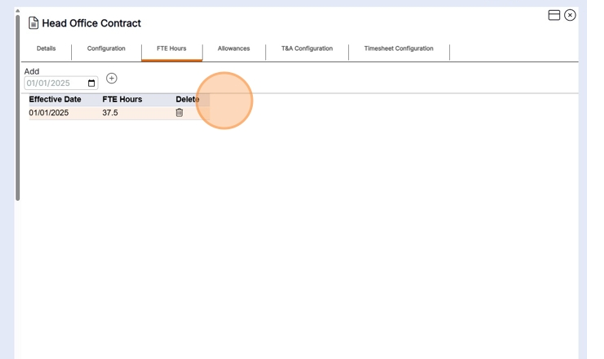
FTE Hours Tab
Step 10 - Add the date this is to start from.

Step 11 - Click the + icon to save and open the record
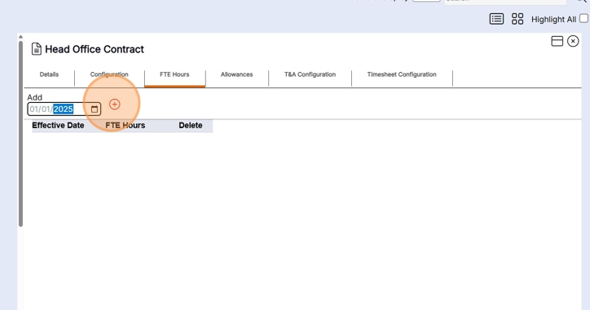
Step 12 - Enter the FTE Hours and press ok to Save

The record has now saved it can be deleted using the bin icon
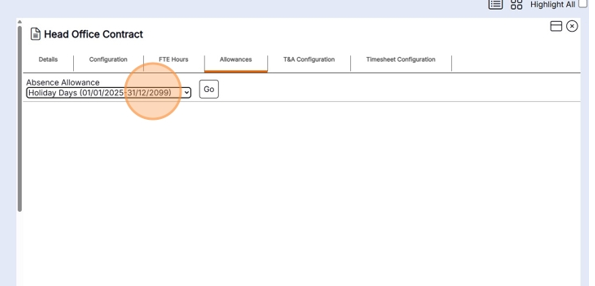
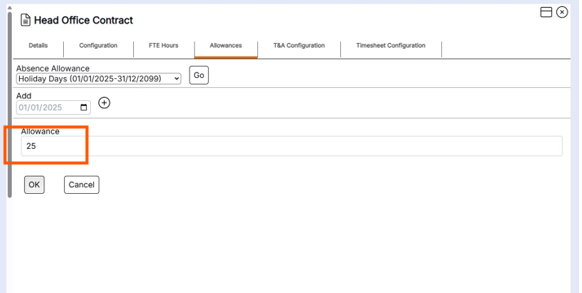
Allowance Tab
The Allowance tab is where the absence allocation for the year is added.
Step 13 - Select the absence period the absence allocation is being added too.
Step 14 - Press go to open the record
Step 15 - Add the start date the absence allocation is valid from and press the + icon to save
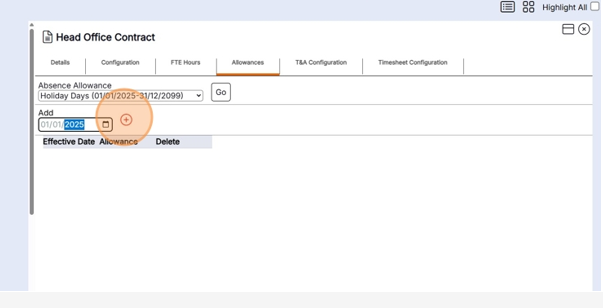
Step 16 - Add the allowance & press OK to save
T&A Configuration tab
Step 17 - Add the date that the T&A Configurations are to start from & press the + button to save and open the tab
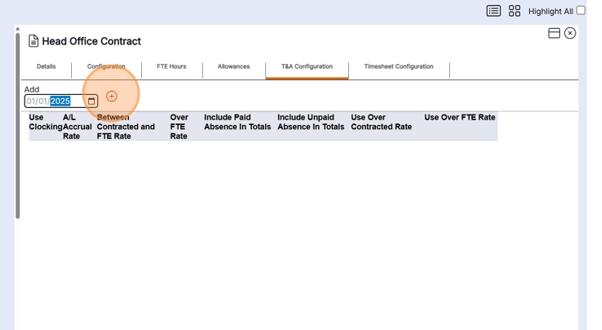
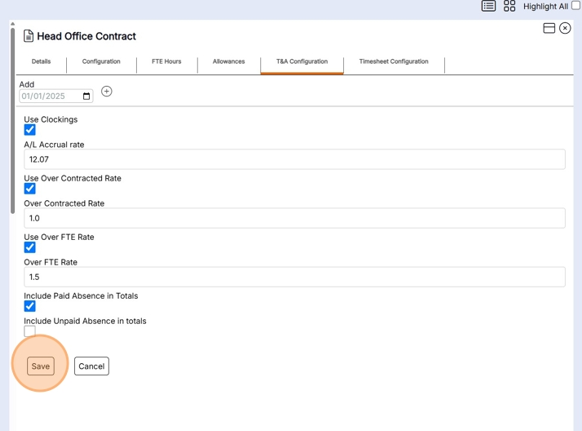
Configure the T&A Configuration to the requirements of the contract
i) If staff are clocking in tick - Use Clockings
ii) If Annual leave is to be accrued the A/L Accrual rate can be ticked. Leave blank if this is to be a set number of days per year.
iii) If over time is to be paid the use Over FTE Rate can be ticked.
NB the standard Over time rules in place are listed as 1.0, 1.5
There are options to include paid and unpaid allowance totals.
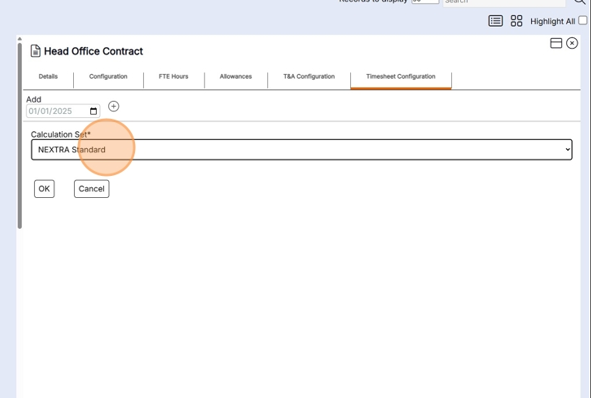
Timesheet Configuration
Step 18 - Enter the start date for Time sheet configuration Click the + icon to save the record and open the tab

Step 19 - Select the Timesheet configuration calculation to be used in this contract.
The Contract record is now complete and can be allocated to a staff record.