
Creating a New Staff Member Profile
This guide provides a comprehensive step-by-step process for creating and managing a new staff member profile, ensuring that all essential information is accurately recorded. It covers various tabs, including personal details, payroll, contracts, and skills, making it a valuable resource for HR personnel. By following this guide, users can streamline the on boarding process and maintain organised staff records, ultimately enhancing operational efficiency.
Step 1:
Open the Admin section from the main Nextra navigation page
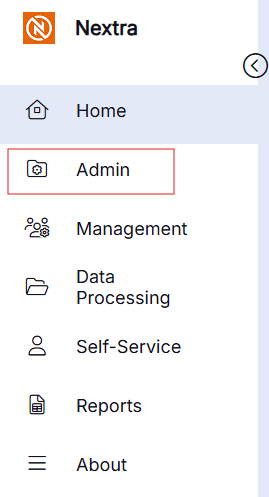
Step 2:
Open Staff Admin then click on Staff
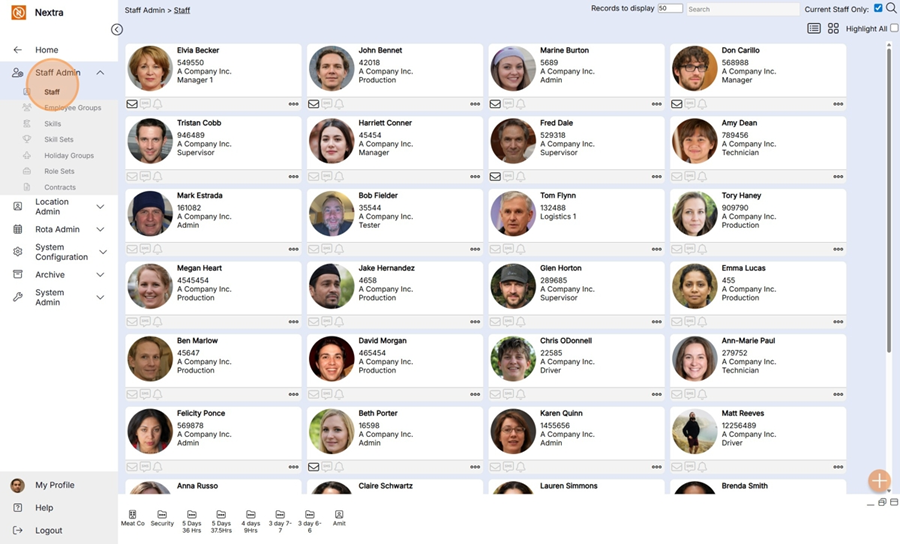
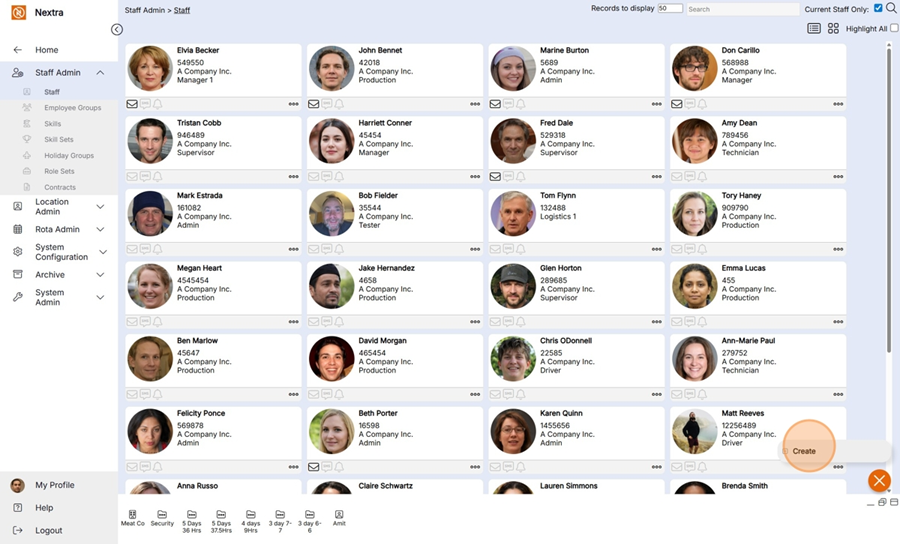
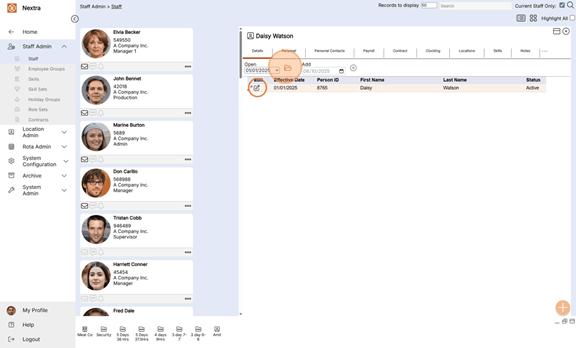
Step 3:
At the bottom right hand side is the + icon - Click "Create"
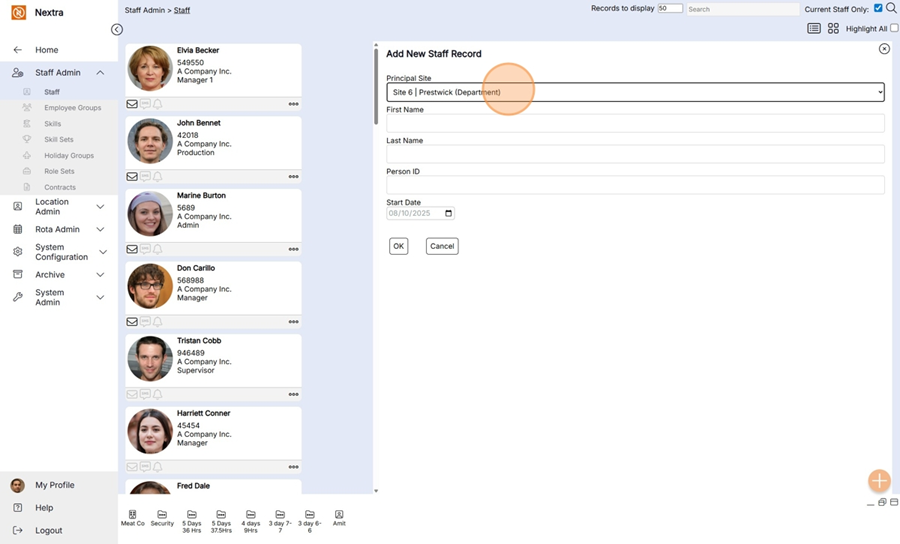
Step 4:
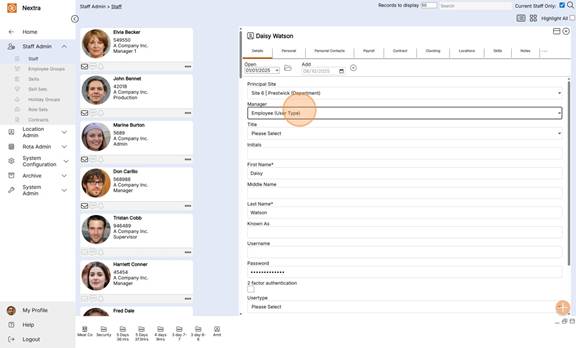
Complete the information in the Add New Staff Record.
Select the staff members principal site.
Complete all other fields.
Press OK to save the record or cancel to return to the menu.
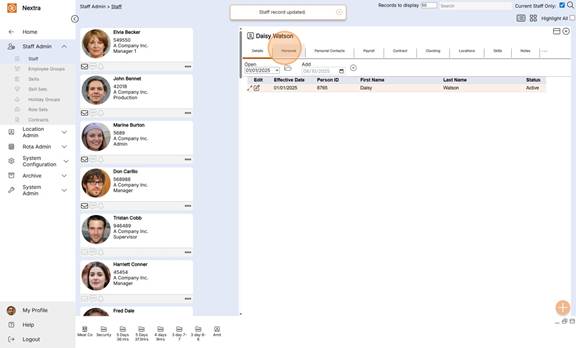
When saved the Staff Members record has been saved,
The following fields are mandatory so they will need to be completed:
- Principle Site
- First Name
- Last Name
- PayrollID
- Start Date
Step 5:
Once the staff record has been saved they will show in the Staff Admin screen
Step 6:
You can search for an employee using the Search field
Please Note: You have to click on the magnifying icon to search for the employee

The following steps go through the information that can be stored for a Staff Member.
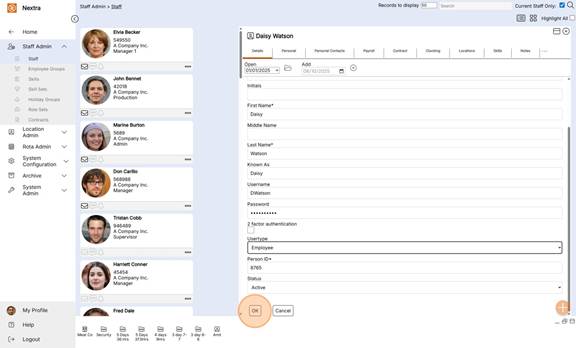
Details Tab
The "Details" tab holds the staff members principal site, log in details and User type information.
To complete the staff members record details either click on the open folder icon or edit icon
Complete the information as per the fields.
These include :- Name, Username. Password. User type, Person ID & Status
To save the record click OK
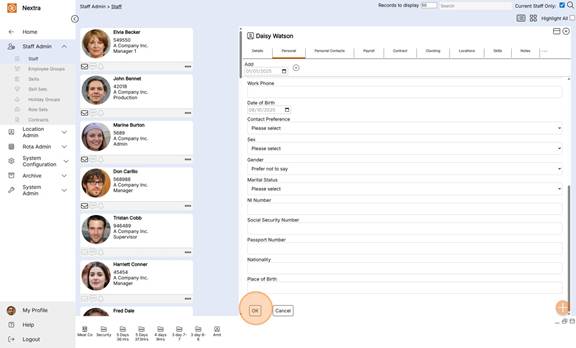
The "Personal" tab holds staff members personal details
First enter the start date, then click the "Add + icon" when creating a new record.
NB - When the record is created an open folder icon will subsequently show click on this to update and edit the record.
Fields include:- Email address, Address, Mobile Phone no, Work phone no. Date of Birth
Contact preference, Sex, Gender, Marital Status, NI Number, Social Security Number, Passport Number, Nationality, Place of Birth.
Complete the fields as required
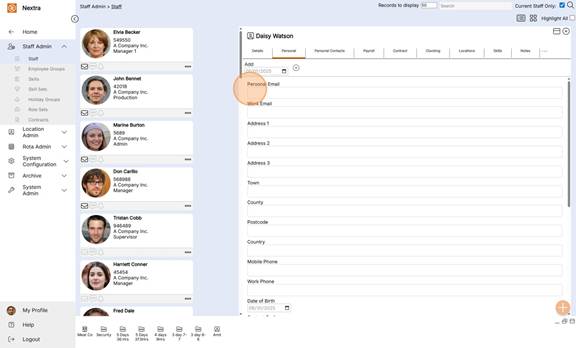
Click "OK" to save the record details
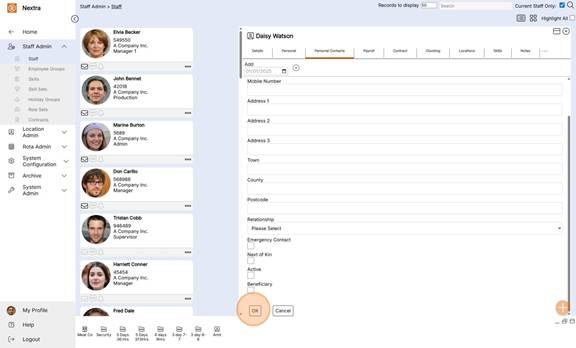
The "Personal Contacts" Tab holds the staff members contact details
First enter the start date, then click the "Add + icon" when creating a new record.
NB - When the record is created an open folder icon will subsequently show click on this to update and edit the record.
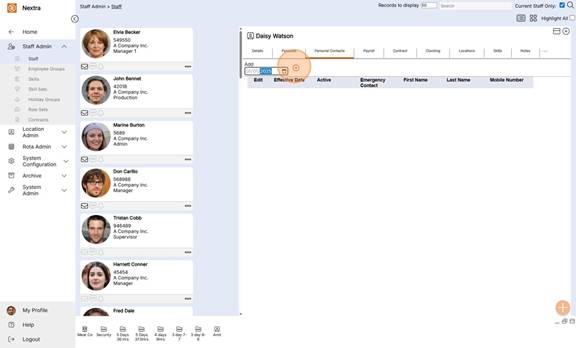
10. Complete the fields as required
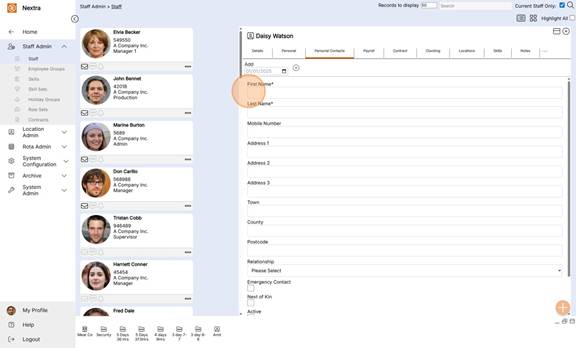
11. Click "OK" to save the record details
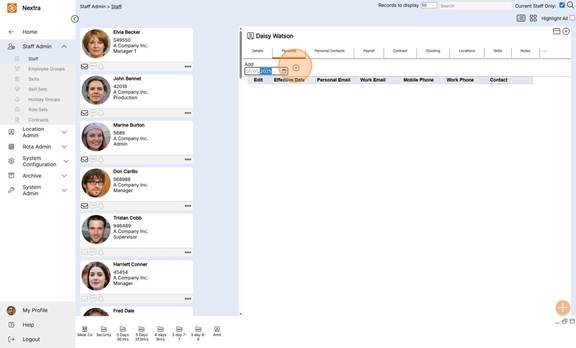
12. The "Payroll" tab holds staff members payroll details
First enter the start date, then click the "Add + icon" when creating a new record.
NB - When the record is created an open folder icon will subsequently show click on this to update and edit the record.
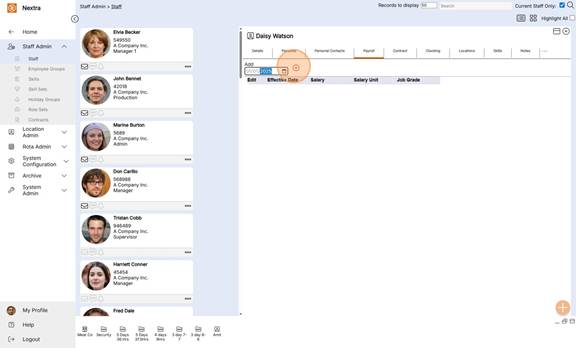
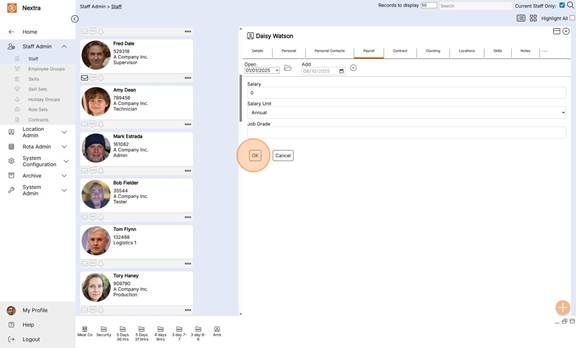
13. Complete the fields as required.
Click "OK" to save
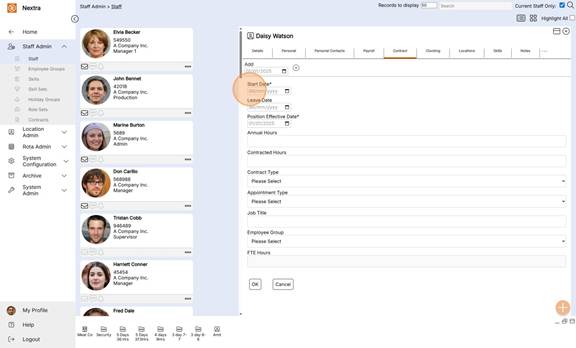
14. The "Contract" Tab holds details of the staff members contract
First enter the start date, then click the "Add + icon" when creating a new record.
NB - When the record is created an open folder icon will subsequently show click on this to update and edit the record.
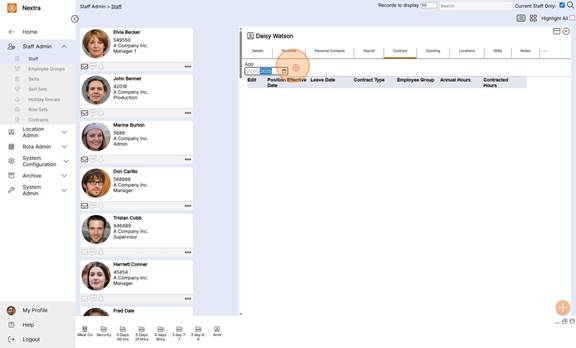
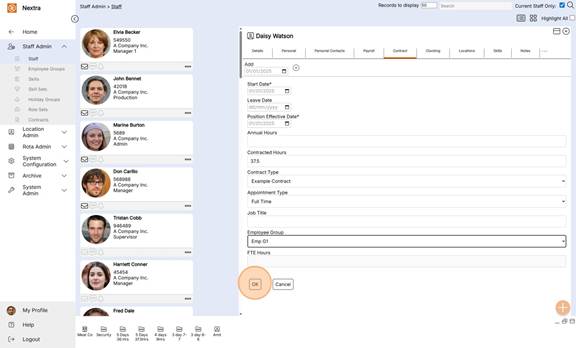
15. Complete the fields as required
NB Enter the staff members start date & when they leave their leave date can be added here,
16. Adding a Leave Date
When a Staff member leaves and is no longer employed by the business to remove them from Rota's, Payroll, Clockings etc Add a leave date to the Contact
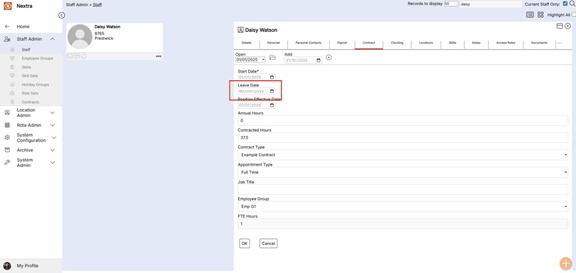
17. Select here the Employee's contract.
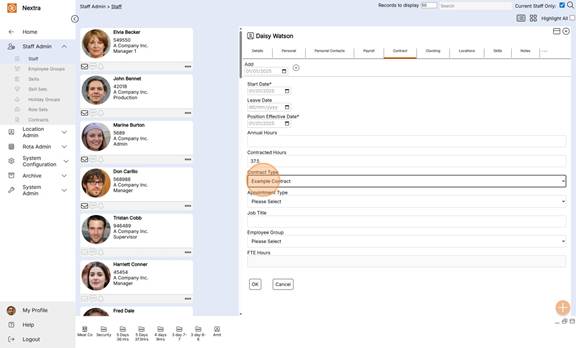
18. Select the "Employee Group" the staff member belongs too.
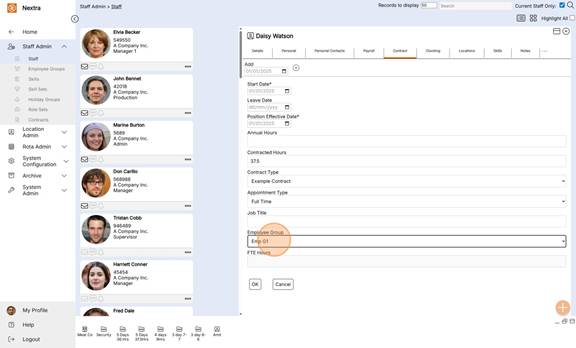
19. Click "Ok" to save the record.
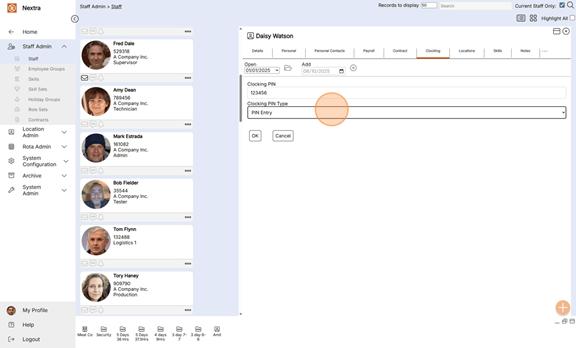
20. The "Clocking" tab
NB this is only a requirement if you are using a clocking in/out system.
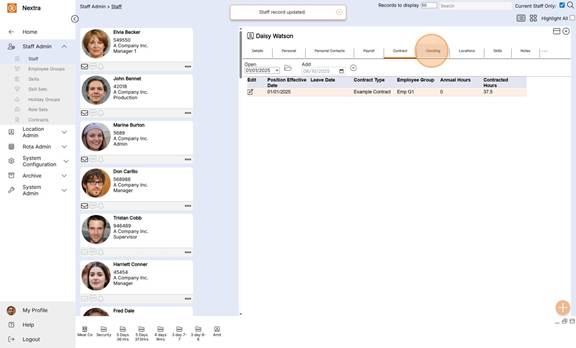
21. Add the date clockings are to start from then click the + icon
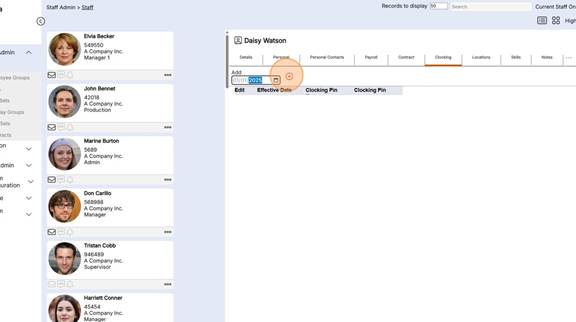
22. Enter the clocking details as required
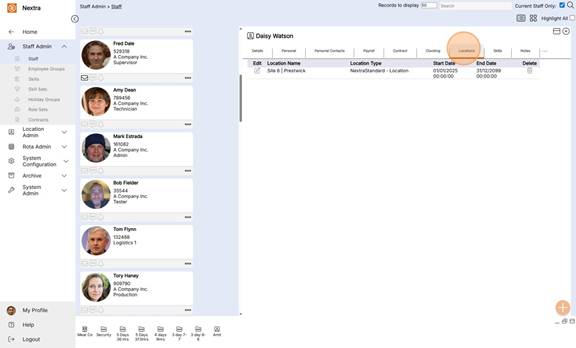
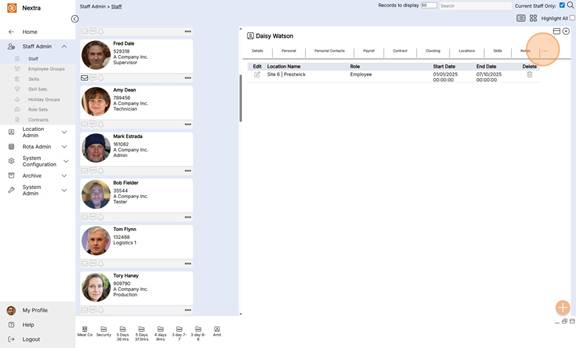
23. The "Locations" tab - This is set when you selected the principal site at the start of the set up process.
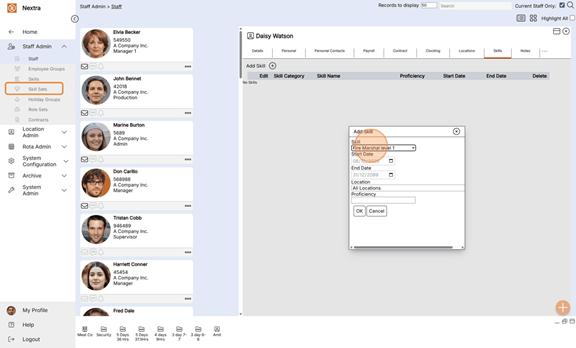
24. The "Skills" tab is an area where you can collect relevant skills data for running your business.
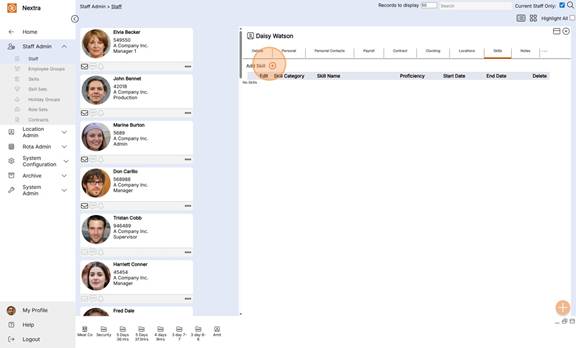
25. Set up any skills you wish to record for your staff member - If the skill set you wish to allocate to a staff member isn't available go to the menu "Skill Sets" and set the skill set up.
Click here for instructions on setting up "Skill Sets"
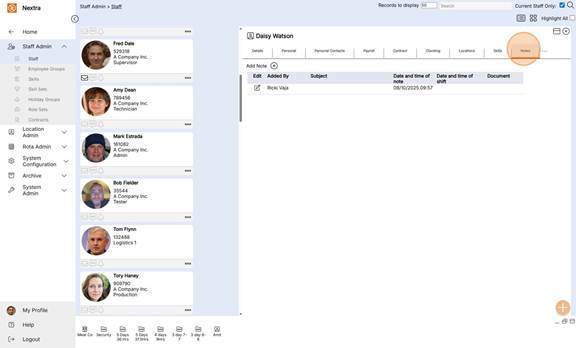
27. The "Notes" Tab
Notes on a staff member can be written here
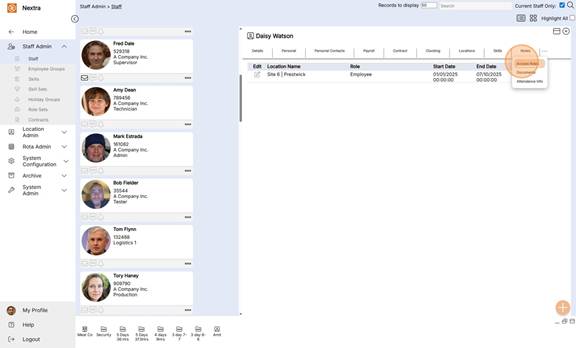
28. If you see the 3 dots there are more tabs - click on these to view
29. The "Access Role" is location for the staff member - as set at the beginning of this process
30. The "Documents" Tab - Here you can save any additional documentation related to the staff member - i.e. certificates, qualifications
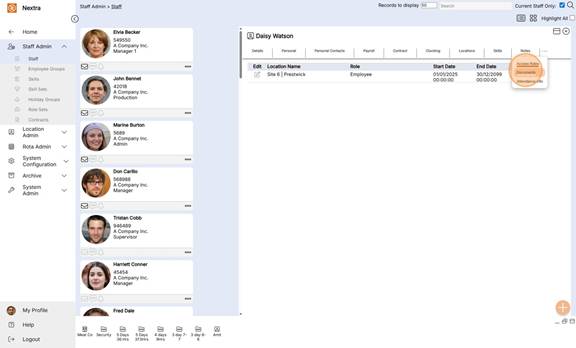
31. Files can be uploaded and saved here.

32. The "Attendance Info" Tab when expanding the folder will show "Absences, "Clockings" & "Adjustments"
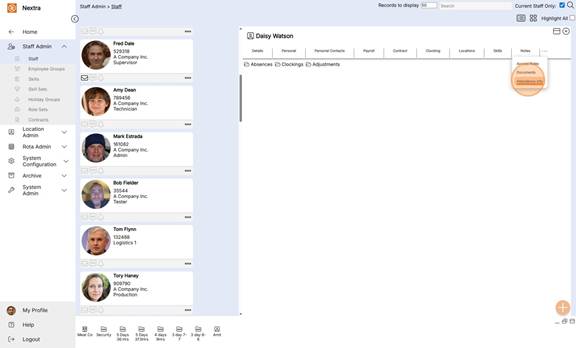
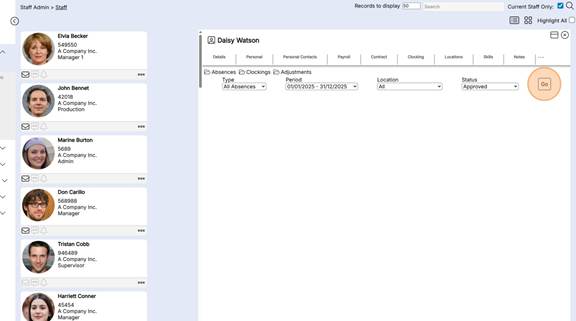
33. On Clicking the Absences folder when adding the search data to these fields a staff members absences can be viewed.
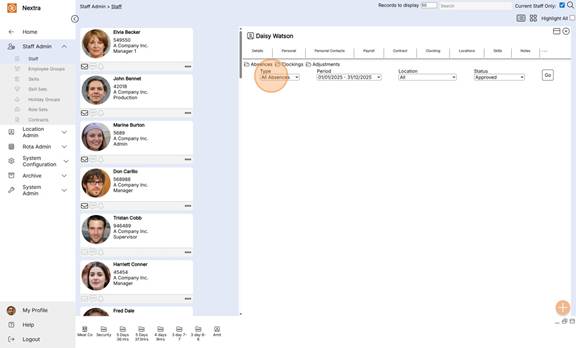
34. Click this button field.
35. The "Clockings" tab will show any clockings for the staff member if you are using clockings.

36. "Adjustments"
Here you can view any adjustments made.
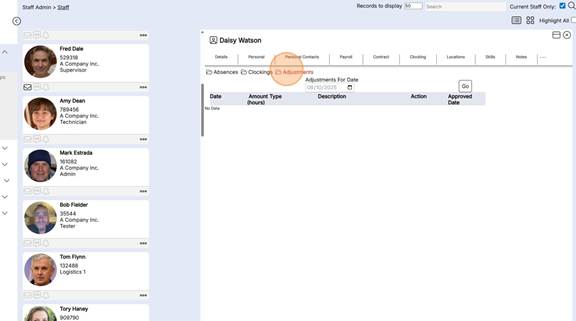
37. Enter the adjustments date, Click the Go button field. and any adjustments will be shown here.

Next Steps; When the staff members record has been completed. shifts can be entered on to the staff member.
Click here to see how to add a staff member to the rota.