Amending existing Shift Patterns
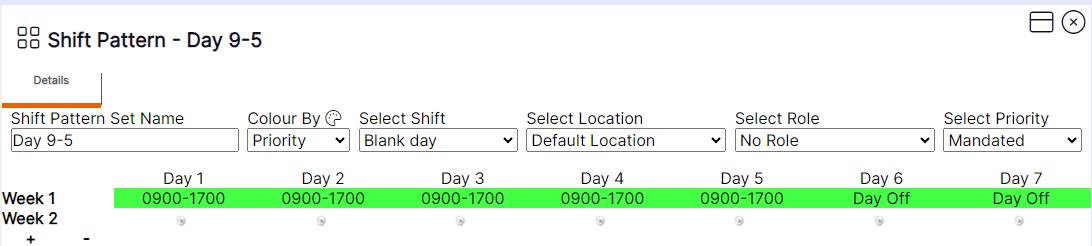
Step 1- Select the appropriate shift from the ‘Select Shift’ drop-down menu, select the role of the shift to be worked and select the shift priority from the drop-down.
Step 2 - Add the shifts required for the new ‘Shift Pattern’ to the relevant week in the pattern by clicking on the cell for each day. To move onto the next week, click the + under Week 1, and Week 2 will appear.
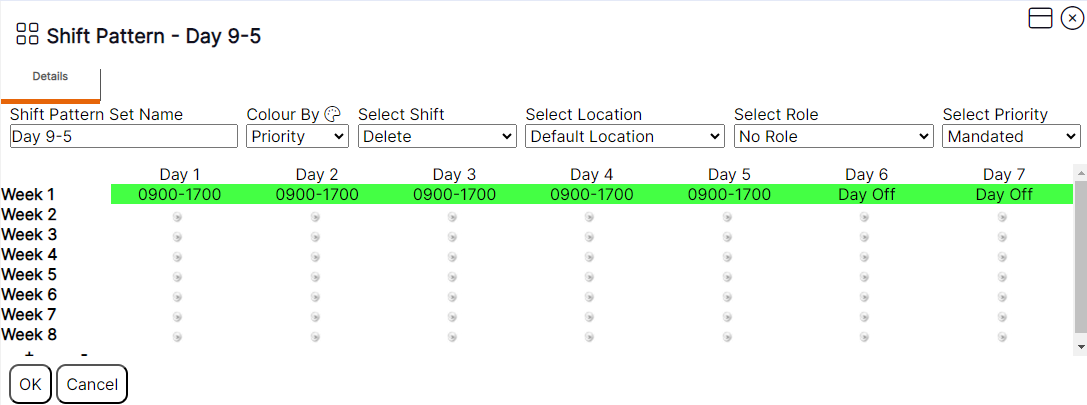
HANDY HINT 1: If you need to remove existing shifts from an existing pattern you can select the option of delete from the ‘Select Shift’ drop-down menu and click on any existing shifts to remove them
Select Priority : A ‘Mandated’ priority refers to a working shift, therefore, will display and be treated as such by the software.
An ‘Availability’ priority refers to a period that the worker is available to work but not actually scheduled to work, therefore will be treated, and displayed as such by the software. ‘OT 1.5’ would indicate that the entirety of the shift is overtime at a value of 1.5 always within the working pattern.
HANDY HINT 2: Prior to creating or amending a pattern, users must create all the ‘Shift Times’ and all the ‘Role Sets’ (role the staff member will be working for the shifts in this pattern), required for the pattern. Only once ‘Shift Time’ and ‘Role Sets’ have been created will they display in the Select Shift/Select Role drop-down menus for you to use within your pattern.
HANDY HINT 3: The system will automatically apply a blank day to days with no shift. For example, if a shift is added to day 1, followed by day 4 being selected, days 2 and 3 will auto-fill with a blank day. This is to indicate to the user where they need to make an entry in the pattern, as there should be no blank days on the rota. If the user has a day off then select 'Day Off' from the 'Select Shift' to replace a blank day.
HANDY HINT 4: If the shifts within this pattern will all be worked at the same location you are going to apply the pattern to you can leave the Select Location drop-down as Default Location. If there is for example, one shift that is always worked at a different location within the pattern, before you click on the day to assign this shift, ensure you have the location of that shift selected within the Select Location drop-down menu. Ensure you update this back to Default Location before assigning any other shifts to the pattern.
Step 3 - Once all the shifts required have been added to the ‘Shift Pattern’, select OK and the new ‘Shift Pattern’ will be saved.

Users can select ‘Cancel’ if they wish to undo their amendments to the ‘Shift Pattern’ since the last time they opened the record, or since the last time they pressed ‘OK’.
The system will advise the user that the save has been successful as follows:

Step 4– Select the 'X' on the pop up.
HANDY HINT: Updating a ‘Shift Pattern’ does not automatically update any rotas for staff who are assigned to the ‘Pattern Group’ that has this pattern attached.
The user will then be returned to the ‘Shift Pattern’ record with the changes made saved.
HANDY HINT: Users can only add up to a maximum of 52 weeks to a pattern. The – symbol will only appear to remove weeks from a pattern if the user has reached the maximum of 52 weeks. However, if the user has blank weeks in the pattern with no shifts assigned, once ‘OK’ has been selected the blank weeks will be removed from view.
Users can amend the name of an existing ‘Shift Pattern’ by following these steps:
Step 5– Delete out the old name and enter the new name of the ‘Shift Pattern’ into the ‘Shift Pattern’ Set Name field.

Step 6– Select OK.

Step 7– Select OK.
The system will advise the user that the save has been successful as follows:
Step 8– Select the 'X’ on the pop up.
Please note: The name of the ‘Shift Pattern’ being viewed in the top left-hand corner will not update until the record is closed and reopened.
HANDY HINT: If this ‘Shift Pattern’ is already assigned to a ‘Pattern Group’, the name will automatically update within the ‘Pattern Group’ when this is changed.
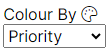
Colour Legend and Colour By drop-down – Allows the user to view the pattern by colours defined within the system.
Selecting the ‘Colour Legend’ button will display the colours set up in the system for the item currently chosen within the ‘Colour By’ drop-down menu.
Colours required for shifts and ‘Role Sets’ can be set up by the user when creating ‘Shift Times’. To view the pattern in the required colours at the time of viewing or modifying, the user should follow these documented steps:

Step 8- Select the required option from the ‘Colour By’ drop-down menu.
Options within the Colour By drop-down menu:
- Priority: The colours defined by the user
- Role Set: Defined by the rota colour selected at the time of creating the ‘Role Set’
- Shift: Defined by the rota colour selected at the time of creating the ‘Shift Time
Once selected, the ‘Shift Pattern’ currently being viewed will update to use the relevant colours, for example, by priority as follows:
The display then refreshes as follows:
Step 9- Select the ‘Colour Legend’ button to display the colours set up for the option chosen in the ‘Colour By’ drop-down menu.